Six seams to go!

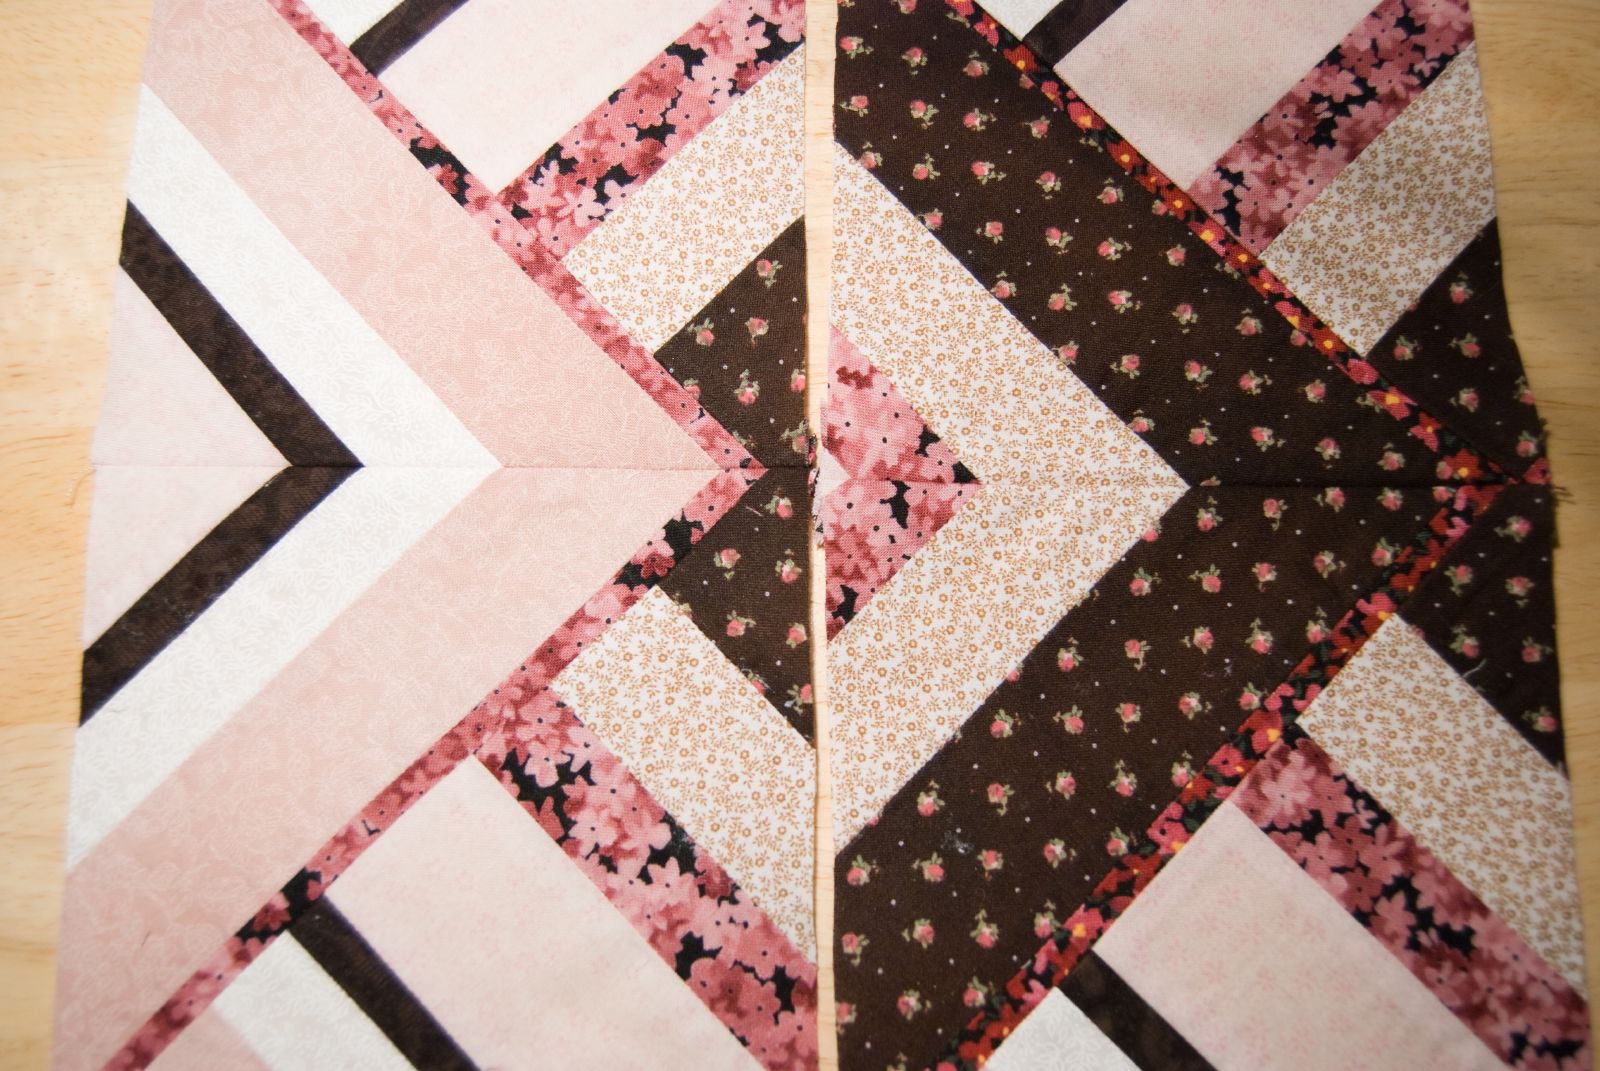
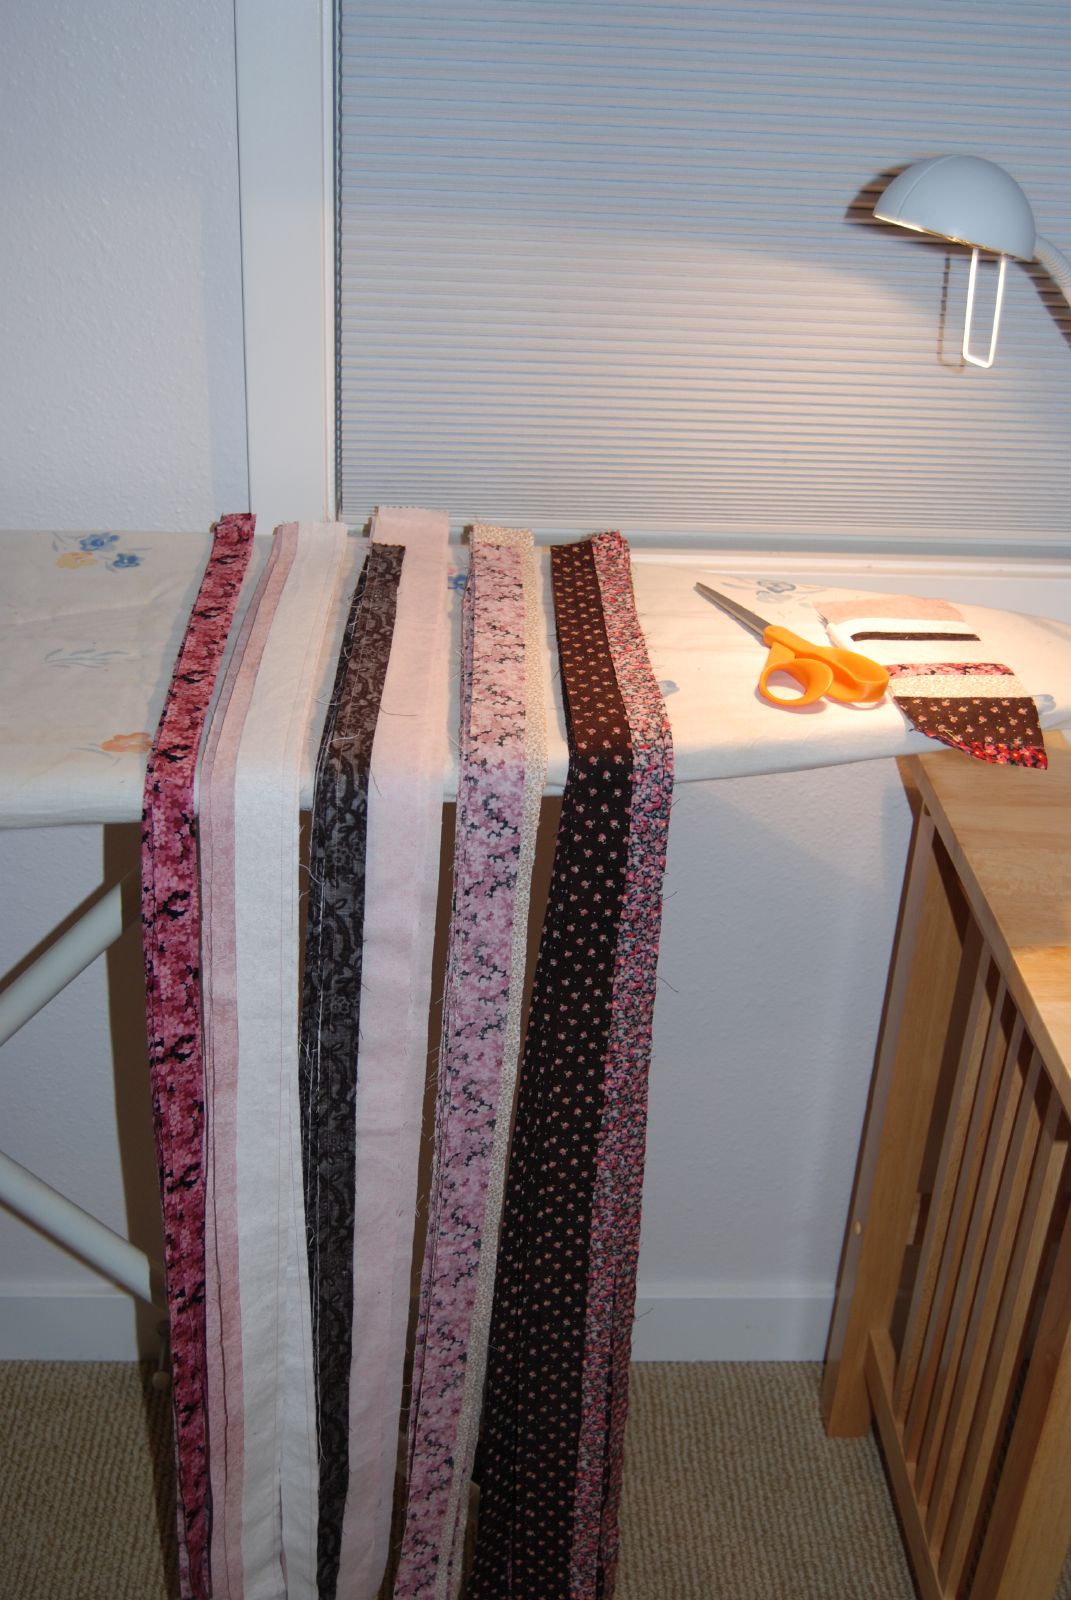
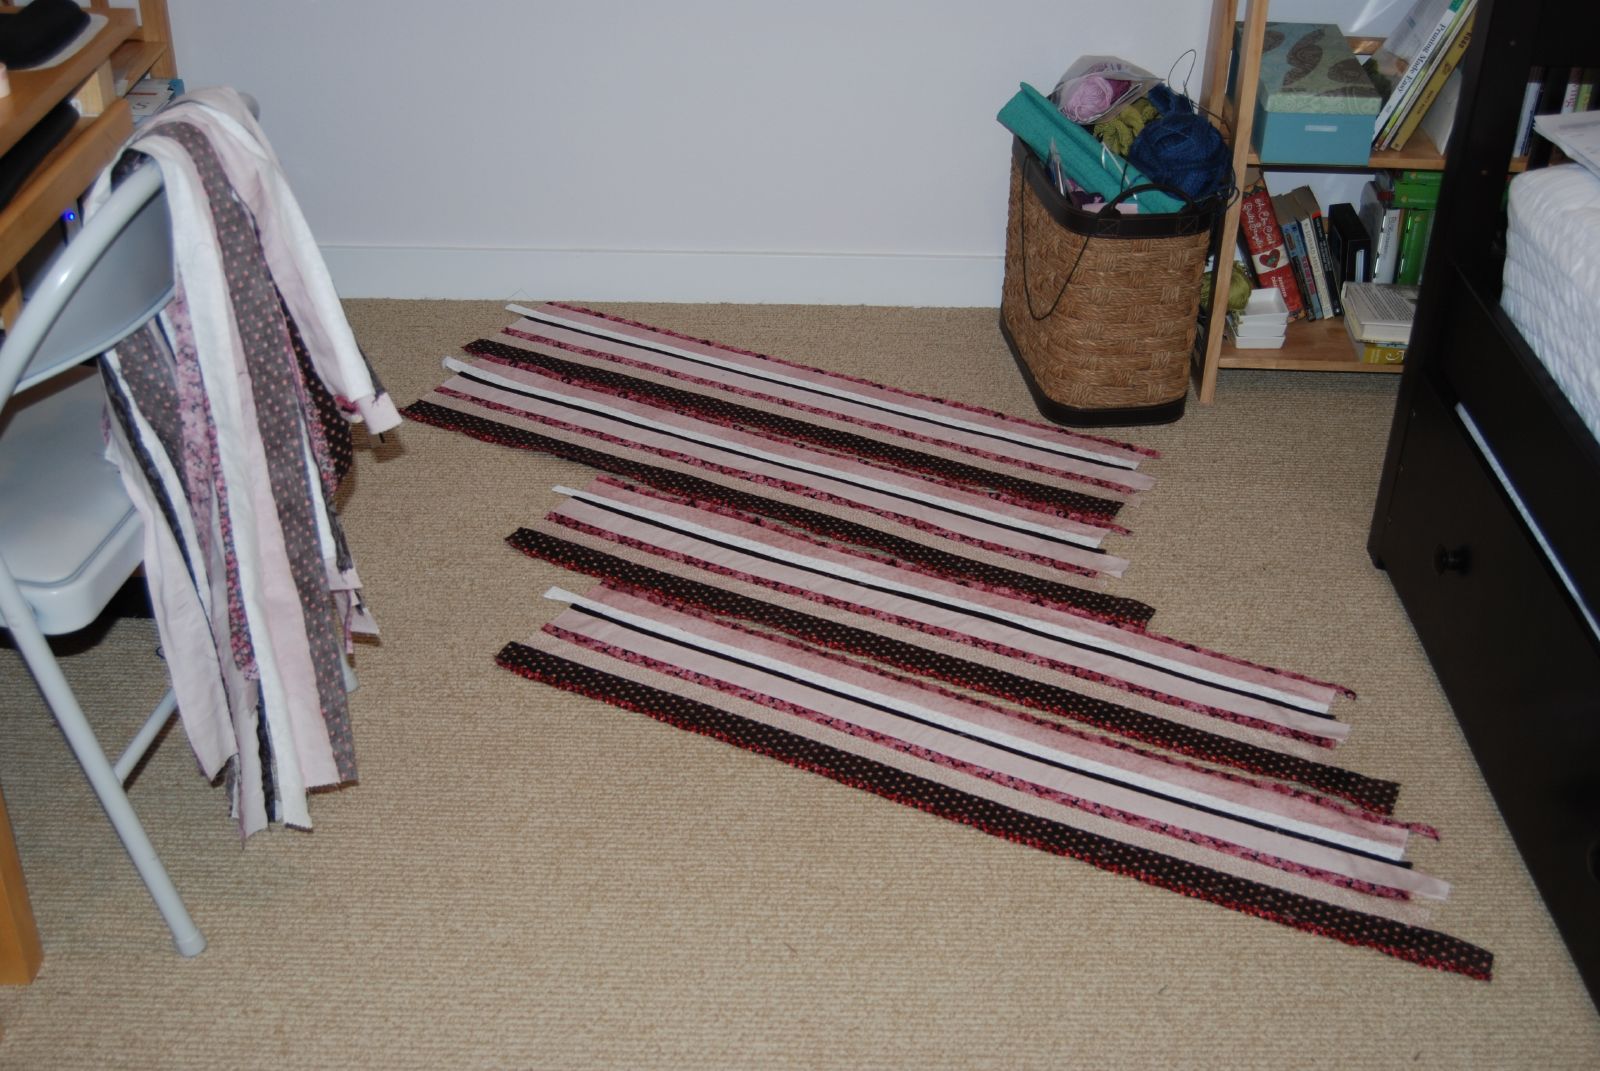
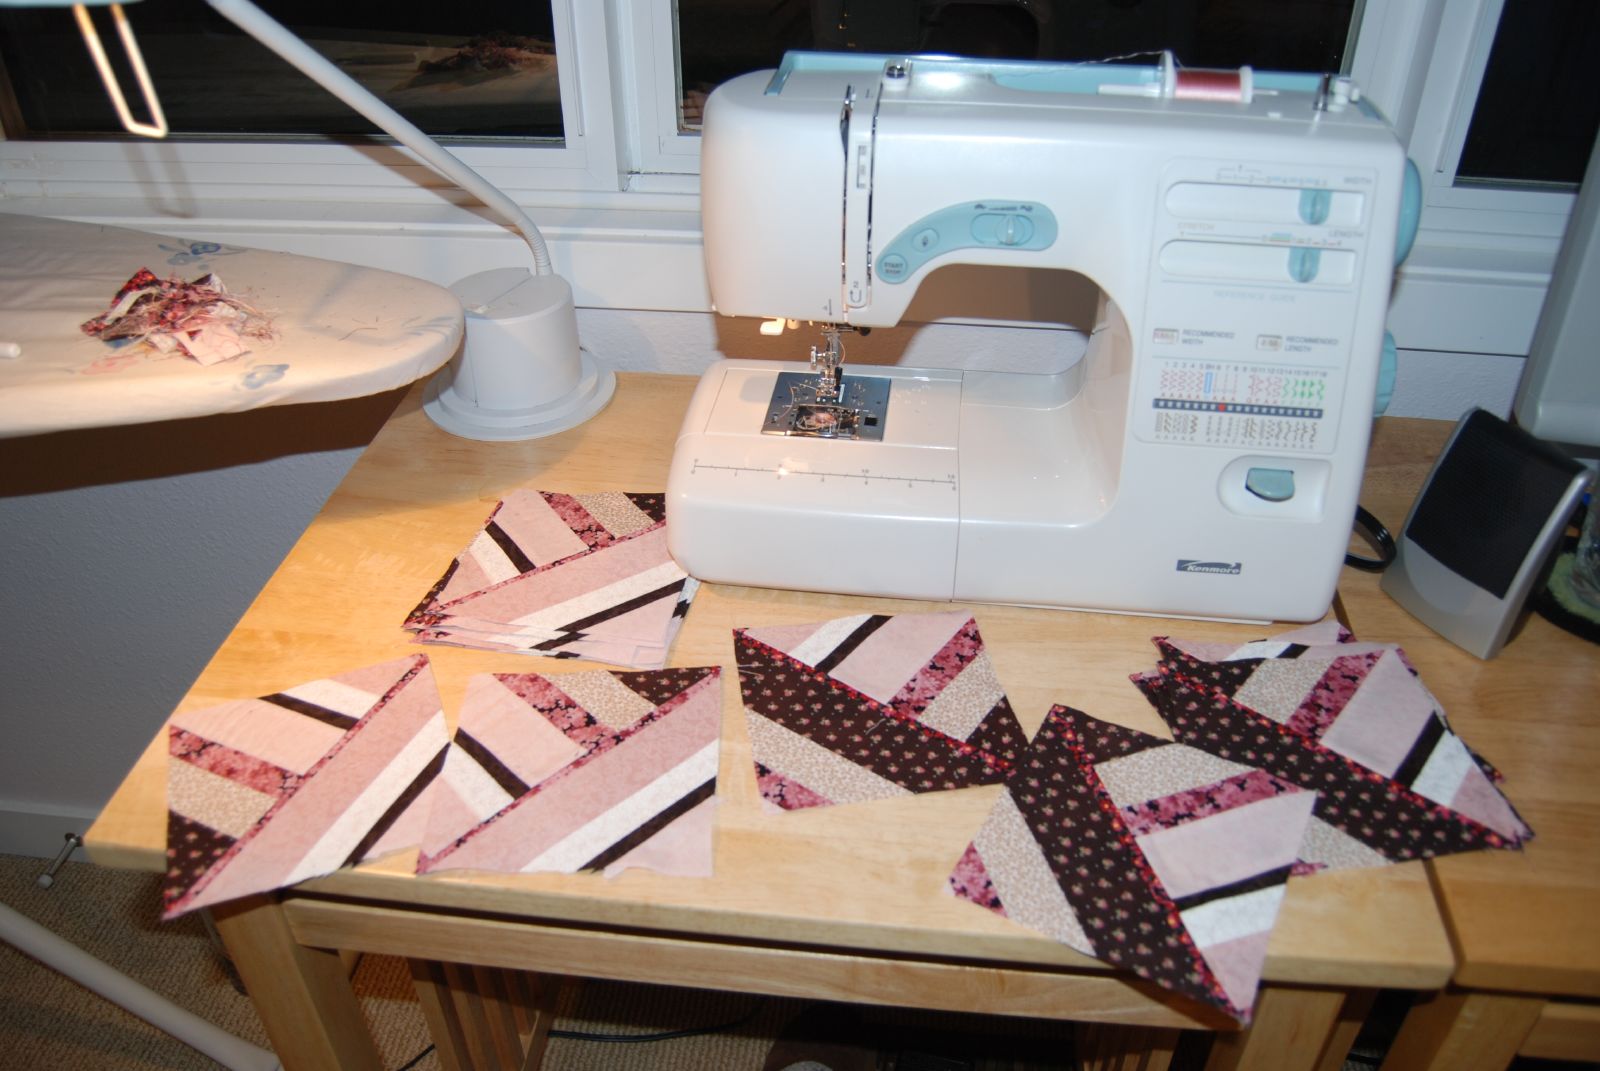
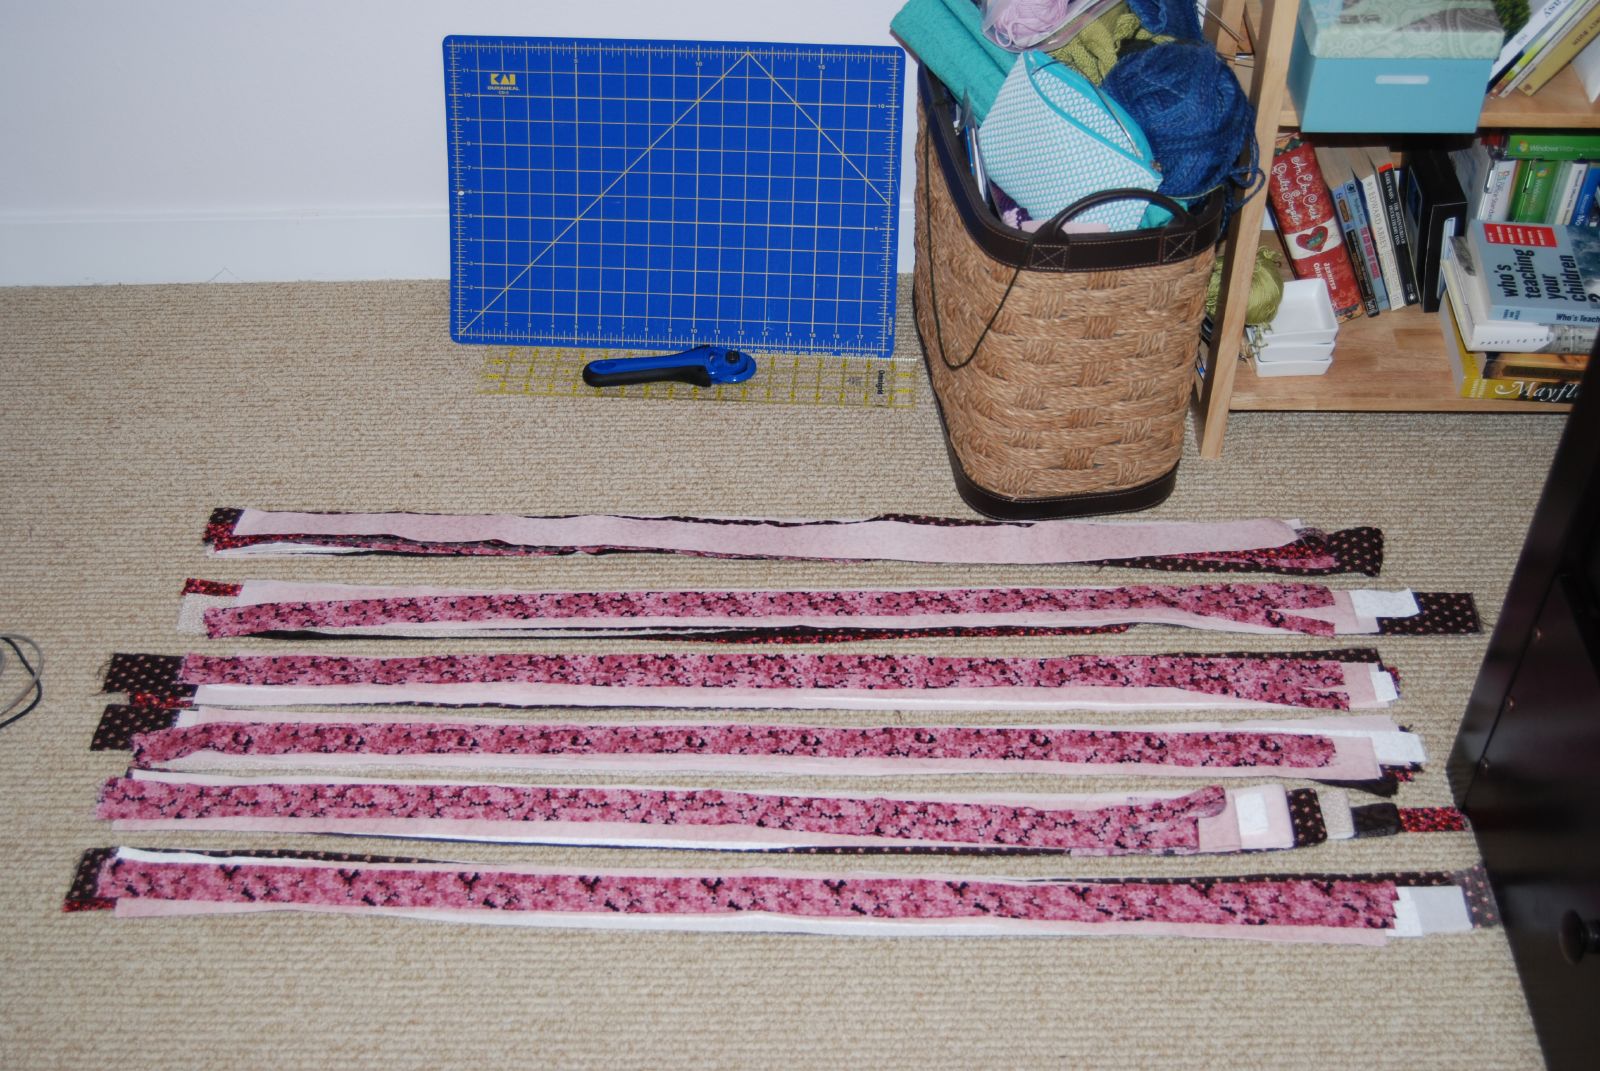
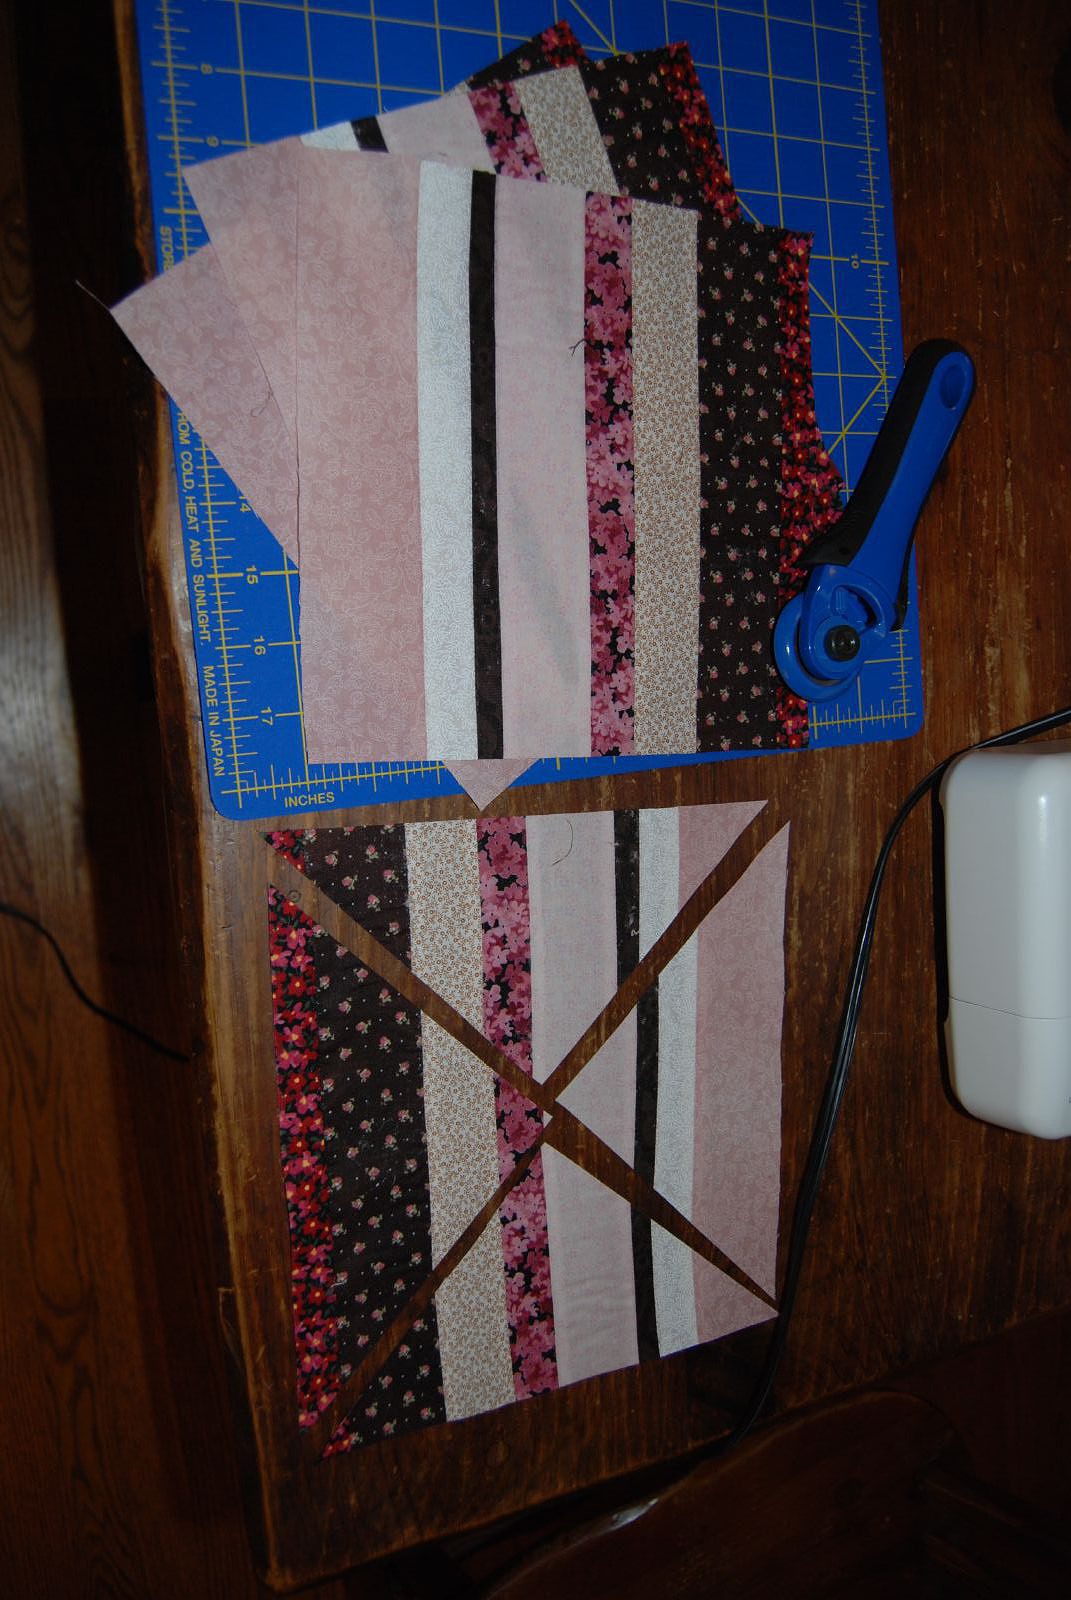
Here are the 7 strips!

I’ll need to do a little bit of trimming (probably on the kitchen table?) before seaming these guys together. And I’m getting awfully close to needing to figure out batting and whether it will be possible to quilt this.

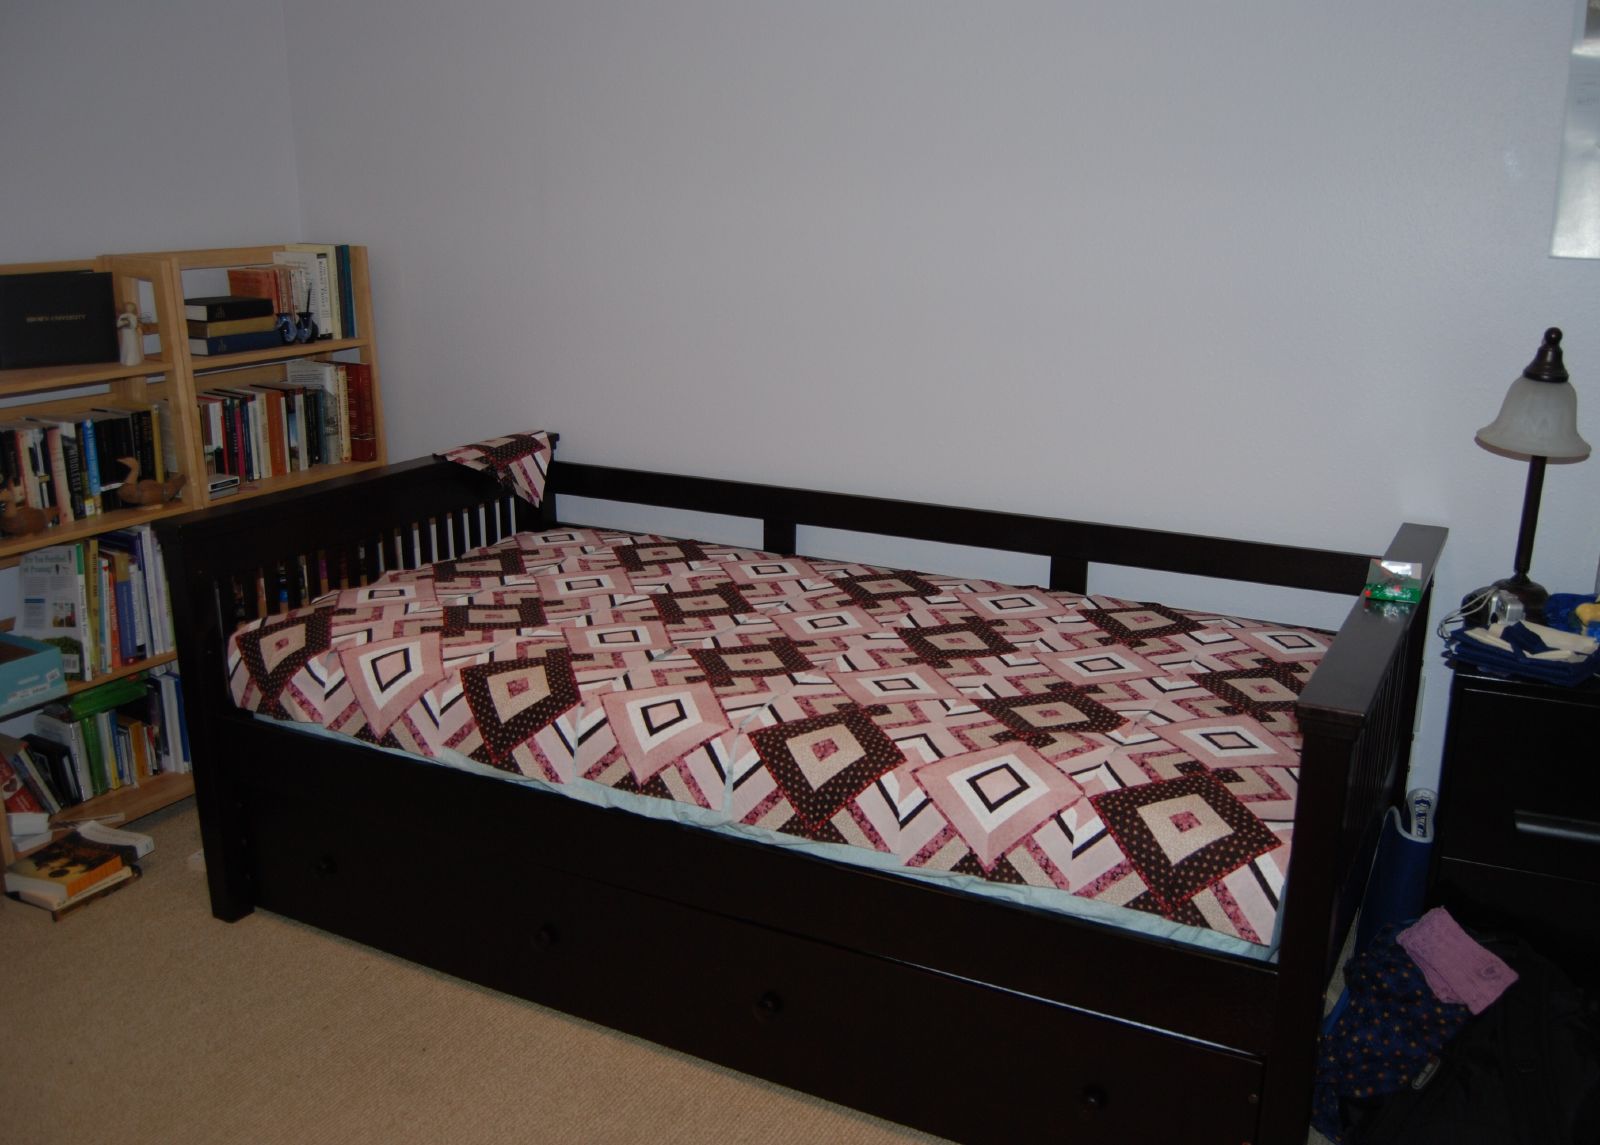
Regarding quilting, I’m sort of torn. The intense quilting (and the oddly stiff, oddly puffy result) is so much work, difficult on the machine that I have, and really not that attractive to me. YET, people (on the internet, my source of all information) really do seem so happy with and proud of the results. What to do? The cheat answer is to just use knotted embroidery thread to hold everything together. Compelling, but I would like to say that I’ve quilted something. Another thought is to just sew the exterior of some of the squares — easy, not fussy, but not particularly impressive, and I’m concerned that I’ll like the pristine pieced top more than the half-heartedly quilted one. I’m just not a fan of prissy things, and too much of the quilted things I see fall in that camp. It’s like knitted things from the 80s — no appeal. Can anyone offer a good guide to (machine) quilting that’s a little bit more modern?

In other news, Larry gets into WA tomorrow. I’m so excited. And I think I need one of these:

It has been SO GRAY here for the last two weeks, and I (never the up-and-at-em type, even under the best of circumstances) am running out of ideas for actually waking up and getting to work at a respectable hour. It’s funny, the culture out here makes a lot out of SAD (seasonal affective disorder) and espresso as a mood disorder treatment during the low-light months, but I don’t find the grey season(s) depressing. The moss and the clouds really are beautiful, and I love the January full-day glimpses of mountains and blue sky. It’s just very, very difficult to get up in the mornings. The cat option makes me laugh. Too bad Kevin’s allergic.

Points!

So all of the triangles are seamed into squares and pressed, and I was feeling sort of depressed about the likelihood that they would actually come together into actual squares of the same size. The more I looked at them and the more I pressed the seams flat, they seemed sort of defective and not-square and poorly measured.

So, a few nights off, and then I started sewing these non-squares into rectangles, and it was magical. With the exception of two or three squares that were truly ridiculous and lopsided going in, everything just worked. I have two piles – twenty more seams and the rows are done, and then it’s six more seams and the top is done and ready for straight borders, a back, and quilting.

The points on the seams are lovely. I’m ALL proud. For example:

Like the way that all of those Vs just *join*? The back of the squares are just as neat (I love seeing the wrong sides of quilts – the fronts always end up looking pretty and sort of OCD, but when you look at the back of a pieced square, you can just see exactly how much WORK went into the thing. Love all of those seams…)

Piles of progress

I’ve finished starching all of the super strips, and cut them into the squares. Major progress!

There’s something about the pile of forty starched squares that just looks so, so monumental to me. Perhaps I’ve just been ironing too long. 🙂 And yet, the impression isn’t diminished when I cut them into triangles (and half of those triangles in half again…)

Daybed quilt

Last time I posted on the quilt, I asked if people thought I should proceed a row at a time, or just stage by stage. I loved the suggestion from the comments to work a row at a time (such measurable progress!) until I tried it – too stilted, and I was getting impatient. So I decided to work the remaining bits in phases. I can always swap to a (faster, easier) row-by-row version if that seems optimal. During the seaming of the first two row’s worth of strips, I felt like if one row went awry, the entire superstrip got all stretched and wrinkly. So, this time, I started sewing all of the strips together in pairs first, and then joined the pairs into larger and larger groups. It may be psychological, but I think it came together better. Here are the initial pairs:

Once everything was seamed, I pressed the seams flat and then ironed in starch. I’ve been using Niagara brand spray starch (it’s what they had in the drug store up the road and it was cheap). I bought a heavy-duty canister and an original one – the heavy duty is definitely the way to go. Original might be better for things you wear next to your skin, but it doesn’t hold the bias edges the way the stronger version does. And, note to self, two canisters would be the correct amount for this size quilt in the future.

Here are the first two rows’ worth of pressed and starched strips:

Starched sets

One row takes two sewn-together rows of strips. You can see the other 6 sewn-together racks waiting to be pressed on the back of the chair.

Strip 2

Making these squares is like coasting downhill. All of the organization and work to sew into strips, press open the seams, and add starch. But then you cut the stiff strips all up into eight neat piles of triangles, and the rest just flies by.

Here’s the pile of pairs of triangles, waiting for seams along the hypotenuse:

And here, a short sixteen seams later, are the small squares that make up the entire row.

A round of pressing and 16 more seams makes 8 rectangles, after more pressing, it’s four seams to make squares, and a final press and 3 more seams and there’s the strip. Very satisfying.

A week’s worth of progress

I’ve finished the first row of my new daybed quilt!! Yay!

Even better is the fact that I now know how many rows it will all take – looks like seven is the magic number. (This is exciting to me – you don’t often get to use sevenths, and for some reason I still remember all of the fraction-to-decimal conversions from Mr. Valle’s 7th grade math class. It will be fun to employ them in the blog sidebar.) After mulling over the first two squares for a few days, I did end up adding a ¾” strip of magenta and reducing the size of the outer pink by ¼”. I think it’s a little less striking, but far more balanced – a tradeoff that I am completely willing to make. I’m no longer left wondering what’s missing, which is still my reaction on the old one. The first two will make great pillow tops.

Equally exciting, and probably deserving a fair amount of credit for my speedy progress so far, is that I have a new desk! It was a Christmas gift from Kevin’s parents after I’d mentioned that I’ve been considering a side-by-side setup for ages. Here it is in quilting mode:

I love that I can have the sewing machine set up while still having easy access to my monitor, mouse and keyboard! I tend to listen to NPR online while I quilt, and this makes seeing the story information, clicking to email, or changing shows so much easier. It’s also nice to me not to have to move the machine every time I’m done with it – it can stay put while it’s needed and then retire to the shelf when it’s not.

Also, I can finally cut long strips at my desk, instead of having to decamp to the kitchen table. 🙂 Certainly helps in keeping the creative mess contained.

Also, all of my mats, rulers and the rolling cutter can live on the spare keyboard tray when not in use (they seem most prone to my knack for finding perfectly-sized and subsequently unrecallable storage spots). I’m all pleased.

Tonight, after washing dishes, I finished cutting the strips for the next seven rows.

The decision remains: do I sew up all the strips, then starch, then cut into triangles and seam? Or do I only do enough for a row at a time? I’m torn.

First sewing on the new quilt!

I probably should have just waited an hour and kept going in the previous quilt post, but recent posts have seemed so long, so I decided to save it for another day.

I finally lived it up and bought pinking shears. Kevin was skeptical, but they were a great addition to the party. After washing and ironing all the fabric (all 52 inches by 19 yards of it, which happily didn’t fray in the washing machine), I cut a preliminary batch of strips. I was pleased that I remembered the lesson of the stretchy way vs. the firm way (aka, with or against the selvage) from two and a half years ago.

I sewed the strips into a panel.

I pressed the seams flat and starched them all stiff. (This was my first time using, or for that matter buying, starch. Very confusing – I had no idea what form factor to even look for. I finally found a spray can in the drug store, and the “heavy” version seems to be perfect for quilting. Once I started using it, Amanda seemed a bit jolted and said it smelled like her mom ironing her dad’s shirts – to me, just “how 1950s”. :-))

Once everything was nice and immobile, I cut the panel into squares, and the squares into triangles. (The bias cutting, and later seaming, creates the need for the starch.)

22 seams later (the same number as for a single 6”x6” log cabin block), I had two 11¼“ squares.

I’m very pleased (especially with how close the seams are to lining up. Yay, starch.), though I feel like the pink square needs more of the magenta flowers. Perhaps a strip around the outside of the diamond? Debates continue, though I think I’ll end up changing it – better fix it now and use the first two squares for pillows than continue to be irked by it.

A new quilt!

I am all excited about the daybed quilt. After more thinking, the goal was to have a pink and brown quilt that would coordinate between the daybed and the light pink walls, and improve the coherence of the rest of the room’s layout and furniture. Given the mission-style rails on the sideboards, straight lines seemed better than curves, squares, or diamonds. Stark and geometric lines, but smoothed by color. I didn’t want something with too much movement – lots of quilt designs have strong diagonal or top-to-bottom lines. And I love the log cabin pattern, and plan to do many more, but I feel like I shouldn’t get into a rut (the world is wide, might as well explore a bit). Again, here’s the shot of the space to fill:

Surprisingly little searching on the internet yielded the Hidden Wells quilt design -– perfect! There’s a great (long) tutorial here, a short cheat sheet here, and some awesome samples (plus this and this). I particularly liked the strip widths and the colors (a bold square, with a lighter shadow) in this one. I whipped out the pencil crayons to come up with a pattern,

calculated fabric in each of the colors (and then doubled them… anything I don’t use for the quilt can be put towards pillows), went to Joann Fabrics, and bought these.

There’s a conventional wisdom that you need at least one “ugly” print to make your quilt pop – to me, an annoying rule. I’m thinking that a mix of colors (dark brown, whites, pinks, and one red) plus different textures will do the trick. Time will tell.