When the cat’s away, the mice further deconstruct the bathroom

Kevin’s in LA all week for PDC (Professional Developers Conference), and about five minues after he got on the airport shuttle, I was full of project plans for the house. I write to-do lists constantly, and I’ve had “repair mbr, closet, BA walls” and “paint MBR, closet, bath” on every single list for at least eight months. I’m so ready to be done with those line items. The biggest problem, of course, is that we need to sleep somewhere else for two days while the room ventilates and the paint dries. So, when Kevin left I only needed to displace one sleeper, and the renovation plan was set for the week! (I should note: Kevin totally approves of this work, it’s just that neither of us have started it yet.)

Of course, once I started with the joint compount, I found many other places to use it. The major one is the main bath, and while repairing the known wall damage is great, I was holding my breath about what we’d find under the big mirror. We were pretty lucky – four 1″ wide holes, plus the holes from the wall anchors that held up the mirror, so all well within the realm of my new-found joint compounding skills.

I unscrewed the two wood backsplashes for the vanity, but they won’t budge, so that will be a task for Kevin and his crowbar.

The thing of joint compound we had in the garage is amusing. The stuff is Barbie Pink (it dries to white – useful), and so slathering it on the walls doesn’t really feel like a legit DIY project.

I’m finding that I like joint compounding WAY more than painting – it’s fast, satisfying, and the cleanup is instantaneous. MUCH better than the priming/painting nonsense! Too bad that the whole edging/rollers stage is next in the process!!

For the next few days, the major potential blocking issues is figuring out how to move our bed (by myself??) in time for painting… hmmm?

Hidden Wells quilt

I finally finished the Daybed Quilt!!

I finished sewing the trim on Tuesday night, and then spent Wednesday night and the last few minutes before James and Thanh arrived on Thursday sewing in all of the thread ends from the quilting. I washed it (to removed all of the starch, and to give it that wrinkly look), and it was finished in time for their stay. Yay!

I’m very pleased with the way it turned out. The trim, especially, is gorgeous to me, and really frames the quilt well. Here’s the top:

And here’s the back:

You can see the quilting pretty well (especially if you click for big), and I got another closeup picture of the quilting in the sunshine:

The pattern for this was Hidden Wells. My full log of blog posts is here. It was a slightly unusual project because it reminds me of so many other people. I bought the fabric with a Christmas gift certificate from Kevin’s sister, I started starching and piecing all of the fabric when Amanda, Brian and Lily were here, and the color combo now makes me think of Kevin’s mom because she was so enthusiastic about it. It’s neat to have all of those associations. πŸ™‚

More light!!

We’d been waiting for weeks for our permit to go through, and then early last week it finally did. On Thursday and Friday we had four trees taken out – yay! Kevin’s Dad actually did the research and found the tree company for us. I loved that – between the scam artists and the specialized lingo, it was great to just be able to trust his recommendation.

Our town limits the number of trees you can remove per year, and generally they require that you replace each healthy removed tree with a new native species. At least the permits are free. (We’ve both heard horror stories of people fined thousands for removing trees without a permit, so the free route seemed optimal.)

When we moved in, our quarter-acre property had 17 trees. Three were fruit trees that we won’t remove (especially after Kevin’s dad did such an amazing job pruning them for us), and one was a little (5″ at 4′ off the ground) hemlock that I cut down myself with the handsaw. So that leaves 14 trees – we just removed four, and will probably do another 5-6 in the next 2 or so years. Major motivations are more light, saving the roof and gutters, and saving the cars (we park in the driveway, and are perpetually fighting pitch). Here’s a very rough map of our property, with the trees we removed crossed out in blue, and the ones slated for the future crossed out in red.

This time, we removed two 65′ hemlocks from the east side of the house. At four feet off the ground, they measured 20″ and 22″ in diameter. (Both qualified as dangerous, given how much they were leaning and how close to the house they were. One of them has been a woodpecker haven all summer, and when they cut it down the center was all rotten. Whew. Good timing, us!) On the west side, we took down a 65′ fir tree that was 26″ in diameter four feet off the ground, and was about seven feet from the house. Our neighbours also told us that the top snapped off in the last windstorm and fell on the cars in our house’s driveway and the neighbours’ – explains why it looks so huge and filled out for “merely” 65′ of height. We also had the remains of the sweetgum removed. (Kevin’s dad cut down about 2/3 of the tree over Christmas – we would have let him keep going except that it was big enough to require a permit.)

Watching them take the trees down was simultaneously fascinating and terrifying. The drop zone was very small. They de-limbed the trees first, and dropped all of the big branches down with ropes.

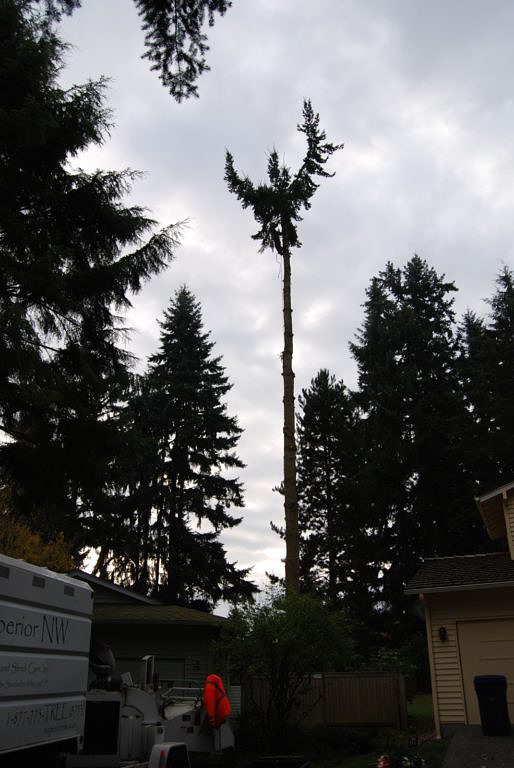
(See the guy up there?) All of the small brush got chopped – they carted away two huge truck worths of it (I was so glad not to be stuffing it in the yard waste bins!). Once they had just the trunk left, they cut 16″ sections off and let them fall to earth. The thuds were ground-shaking, and we have some impressive divots. The rounds (live wood that’s 16″ tall by 20″+ in diameter) is impressively heavy, and it was falling far enough that by the time it hit ground it was really flying.

Before on the east side of the house:

And after:

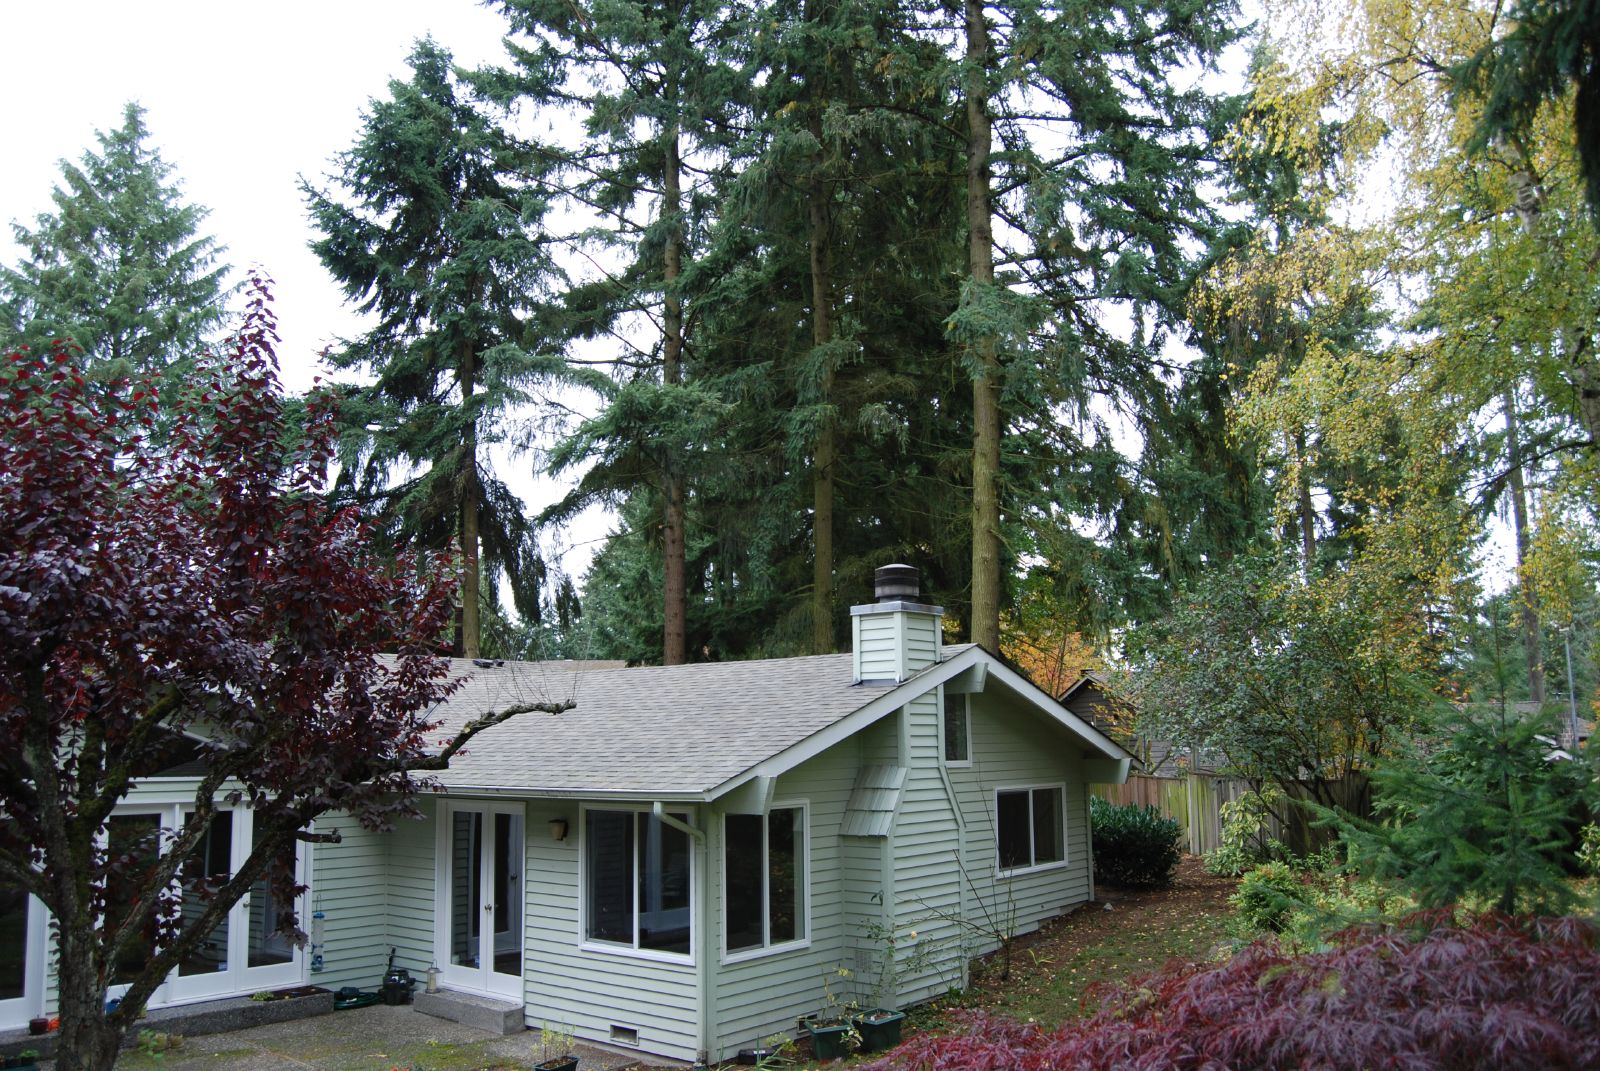
Before on the west side of the house:
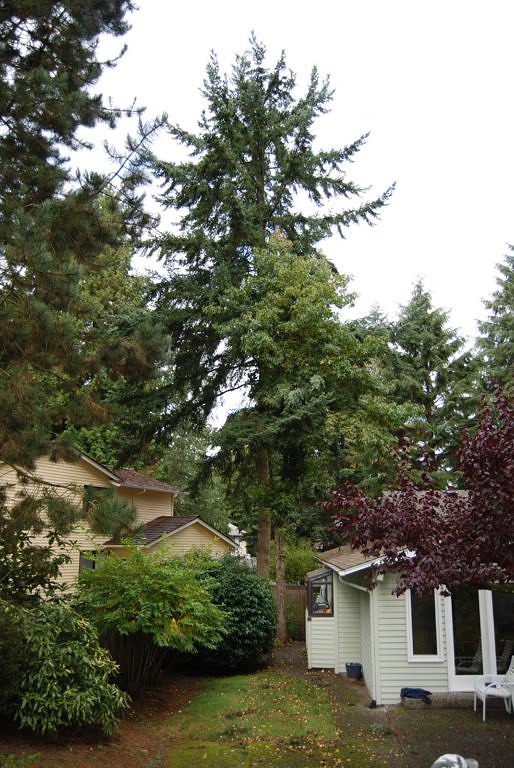
And after:

And from the front, before (photo from June):

And after:

Pictures don’t really do it, but I can’t even tell you how much more sky there is.

And we’re also delighted about all of our new space on the east side of the house (outside our bedroom window) – before it had really just been a forgotten area, but now it’s really worth cultivating. (And it finally gets enough direct sunlight to be able to support bushes and plant life.) We’re excited.

We still need to have three of the stumps ground, and have all of the wood removed. We have some friends who were excited about free firewood, so that should cut down our removal costs a bit. I’m also weighing the merits of just putting a few rounds a week in our yard waste bin. It will be about $150 to have it hauled away, so it’s just on the cusp of being worth it for the time and effort…

Company!

Kevin’s cousin James and his fiancee Thanh were in town for a wedding, so they stayed with us for three nights! They spent time touring around on Thursday and Friday while we were at work, and then we got to hang out in the evenings. Such fun.

Here’s Thanh taking a picture of “these twelve year olds”, as she termed it. πŸ™‚ Kevin and James did a long tour of XBox games on Friday night.

We set up a jigsaw puzzle to do in the meantime – much more fun, in my book. πŸ™‚

And here’s the group right before James and Thanh left for an overnight up in Vancouver.

(You can see the gorgeous farmers market flowers they brought from Pike Place Market on the right!)

I had the camera out for three days but somehow forgot to use it, so I’ll have to get all of Thanh’s photos to round out the record of their trip.

Purple Circle Sweater

Before we left for Ohio, I finally cast on for the Sunrise Circle Jacket. (You can see it here if you’re not on Ravelry and don’t mind scrolling.) It’s been sitting in my Ravelry queue for ages. I debated on the yarn – I had some Cascade 220 Superwash in my stash from Fall 2005. I’d bought it for a sweater in Vogue Knitting that ended up having too much errata, and the color didn’t appeal to me for any other pattern. It’s still not my favourite color, but I’m rather pleased about the idea of actually using it instead of leaving it in the closet to hang over my head. (I’m not a large-stash person, and the fun of buying new yarn is greatly diminished when I already have plenty at home.)

The back was awesome plane knitting, and the I’ve been working on it during Red Sox and football games. Nearly done and ready for the next piece!

(Sorry for the misshapen photo – it’s curling like you wouldn’t believe. Also, note fall leaves from the neighbours’ birch tree!) My stitch gauge is perfect, but my row gauge is giving me trouble – I’m a bit worried how it’s going to affect all of those short rows on the front…

Slow progress

We’ve been going out all week to watch the Red Sox games (we don’t get TBS), and when we get home, I’ve been working on my quilt binding.

I used this tutorial (this one had prettier formatting, but I prefered the way the first one handled the starting edge.) Both of these were recommended by Crazy Mom Quilts, who’s been churning out tutorials of her own all year. Creating the binding and machine sewing it went quite quickly, but handsewing the back edge is massively time consuming. I’m gradually getting faster, and I’m about 75% of the way around, but it’s already been an eight hour project. Whew! It’s so incredibly crisp and pretty, and I can finally see the light/finished quilt at the end of the very long tunnel, so it feels worth the effort.

Secret knitting

Knitting content on the blog has been fairly sparse mostly because August and September were devoted to finishing a sweater for a friend’s daughter’s 2nd birthday.

I don’t know if you remember the nearly–finished lace twist front top that I’d decided to rip a few months ago? I’d started it back in June 2006, and it was a ton of fun to knit. Later that summer, I used the lace from the twist front top to knit a sweater for the same friend’s daughter-to-be.

And then I returned to the original top, knitting away, and in fierce denial about how narrow it was.

I finally ripped it this August. Since it was actually the correct width for the 2-3 year sweater patterns I was finding, I decided to refashion the back and then knit a new front and sleeves. It turned into quite the long project (so much bigger than the baby sweaters I’ve worked on recently! Crazy how much they grow!), and I had several attempts at the correct amount to increase for the sleeves. They look incredibly long to me, though the measurements matched the patterns I was basing the dimensions on.

I love the buttons – they are simple, but an exact color match. I debated on the number, but three seemed good to me.

And one last photo on the counter – this one is harder to see, but it’s a much better catch of the color. The light blue is hard to catch in the grey fall light!

Details about the pattern and dimensions on my Ravelry site!