Category: quilting
Protected: A baby-quilt-to-be
Bento Box Baby Quilt
With all of the hot weather, I’ve dedicated a lot of time to sitting with my feet up in cool places (love those comfy Starbucks chairs!). For my birthday, I got a Kindle (wonderful little thing), so that’s been a good source of amusement, but I’ve also finally committed time to sitting down and finishing the bento box quilt – adding the binding, and finally sewing in all of the loose ends from quilting.
You can sew on one side of the binding with the machine (generally to the front, but I forgot and sewed it to the back instead. Oops. Luckily, I think I’m the only one that will ever notice.), but the second side needs to be sewn by hand. I am so slow at that kind of work, but the effort is worth every minute – I love the way the binding looks when it’s done.

So smooth and finished.
Here’s the finished quilt, all washed and crinkly:

And the back, where the quilted circles are more visible:

Kevin took all of the photos. He was playing with his new flash, umbrella and other photo equipment, and managed to get an amazing shot of the texture (from the quilting and the crinkly, washed cotton) of the front:

I am so happy with the way this turned out. I think the quilting was a perfect choice – continuing the geometric theme started by the square piecing, but not too rigid. Somehow it doesn’t seem like a baby quilt should be all right angles – I like that the circles soften things a bit. The choice to use three groups of circles was mostly stylistic, but a sentimental part of my mind also thinks of them as representing the three of us as a family.
Finishing the baby’s knitting didn’t seem to convince him it was time to appear, but perhaps he was waiting for his quilt? I’m still a week shy of my due date (August 10th) so maybe he’s just biding his time in there, having too much fun with all of the stretching and hiccupping, but we’re very eager to meet him. 🙂
Roundabout
Here’s a late-night photo of the beginning of the quilting.

I love the way the rings are turning out. I had to run out and buy a compass to build my circle templates, and this is as far as I could get with it (it has a max diameter of 13 inches). I’m thinking I should be able to eke out a few more with a longer pencil, and then I’ll start using a string/pen homemade system. Each circle’s radius is an inch greater than the previous one. The sewing went very smoothly, except for the tiniest circle (the size of a quarter) – I just can’t turn the fabrics quickly or smoothly enough to make it circular. I keep ending up with misshapen ovals. I’m going to need to practice until I can manage a better version, I think.
This was my first time using a fabric pen – rather a success. I found a purple one that has disappearing ink. The package said it would disappear within 48 hours, but my experience has been more like 10 min to 2 hours, depending on the weight of the line I drew. It’s hard to consistently trace the stencils hard enough to get a heavy line that lasts. Instead, I started tracing a circle or two at a time and then sewing it before it disappeared. Not entirely efficient, but the end result is great.
A bit more coordinated
Since I finished my Olympic Mountain comforter a year and a half ago, I’ve been meaning to use the extra fabric left over from the trim to make a matching bed skirt. For a while we had a ruffled white lace thing, but it did not look nice with the dark quilt and wood bed, so we’ve just had a bare box spring. Not the most attractive option.
The sewing for the bed skirt was not hard (straight seams, cotton fabric), but there have been a slew of delays. First I didn’t actually have enough of my patterned fabric (amazingly, three years later Joann’s still had it in stock!), then I was dragging my feet on measuring and cutting the pieces. On the whole, I’m good at designing things to fit a space or an object, but when the measurement is larger than my arm-span, I always seem to get a bit off. Luckily, a bedskirt does not demand the same precision of measurement that trim does (and this one doesn’t even require perfectly parallel lines, since the skirt bottom is going to be tucked behind the base of our bed frame), so once I finally got started last week the project moved pretty quickly. The biggest issue was actually just that I’m getting ponderous enough that doing all of the measuring out, pinning, etc. on the floor was harder than it would have been normally. I made three long panels (one each for the two sides of the boxspring, and one for the base), and four squares to wrap the corners. I still have my bed sheets from college, though the twin extra long isn’t a useful size, so I used one flat sheet for lining the panels and the other for the piece that lies between the box spring and the mattress.
Here’s the empty box spring after we’d removed the mattress and bedding:

And here it is with the new bedskirt in place:

And the made-up bed in the morning:
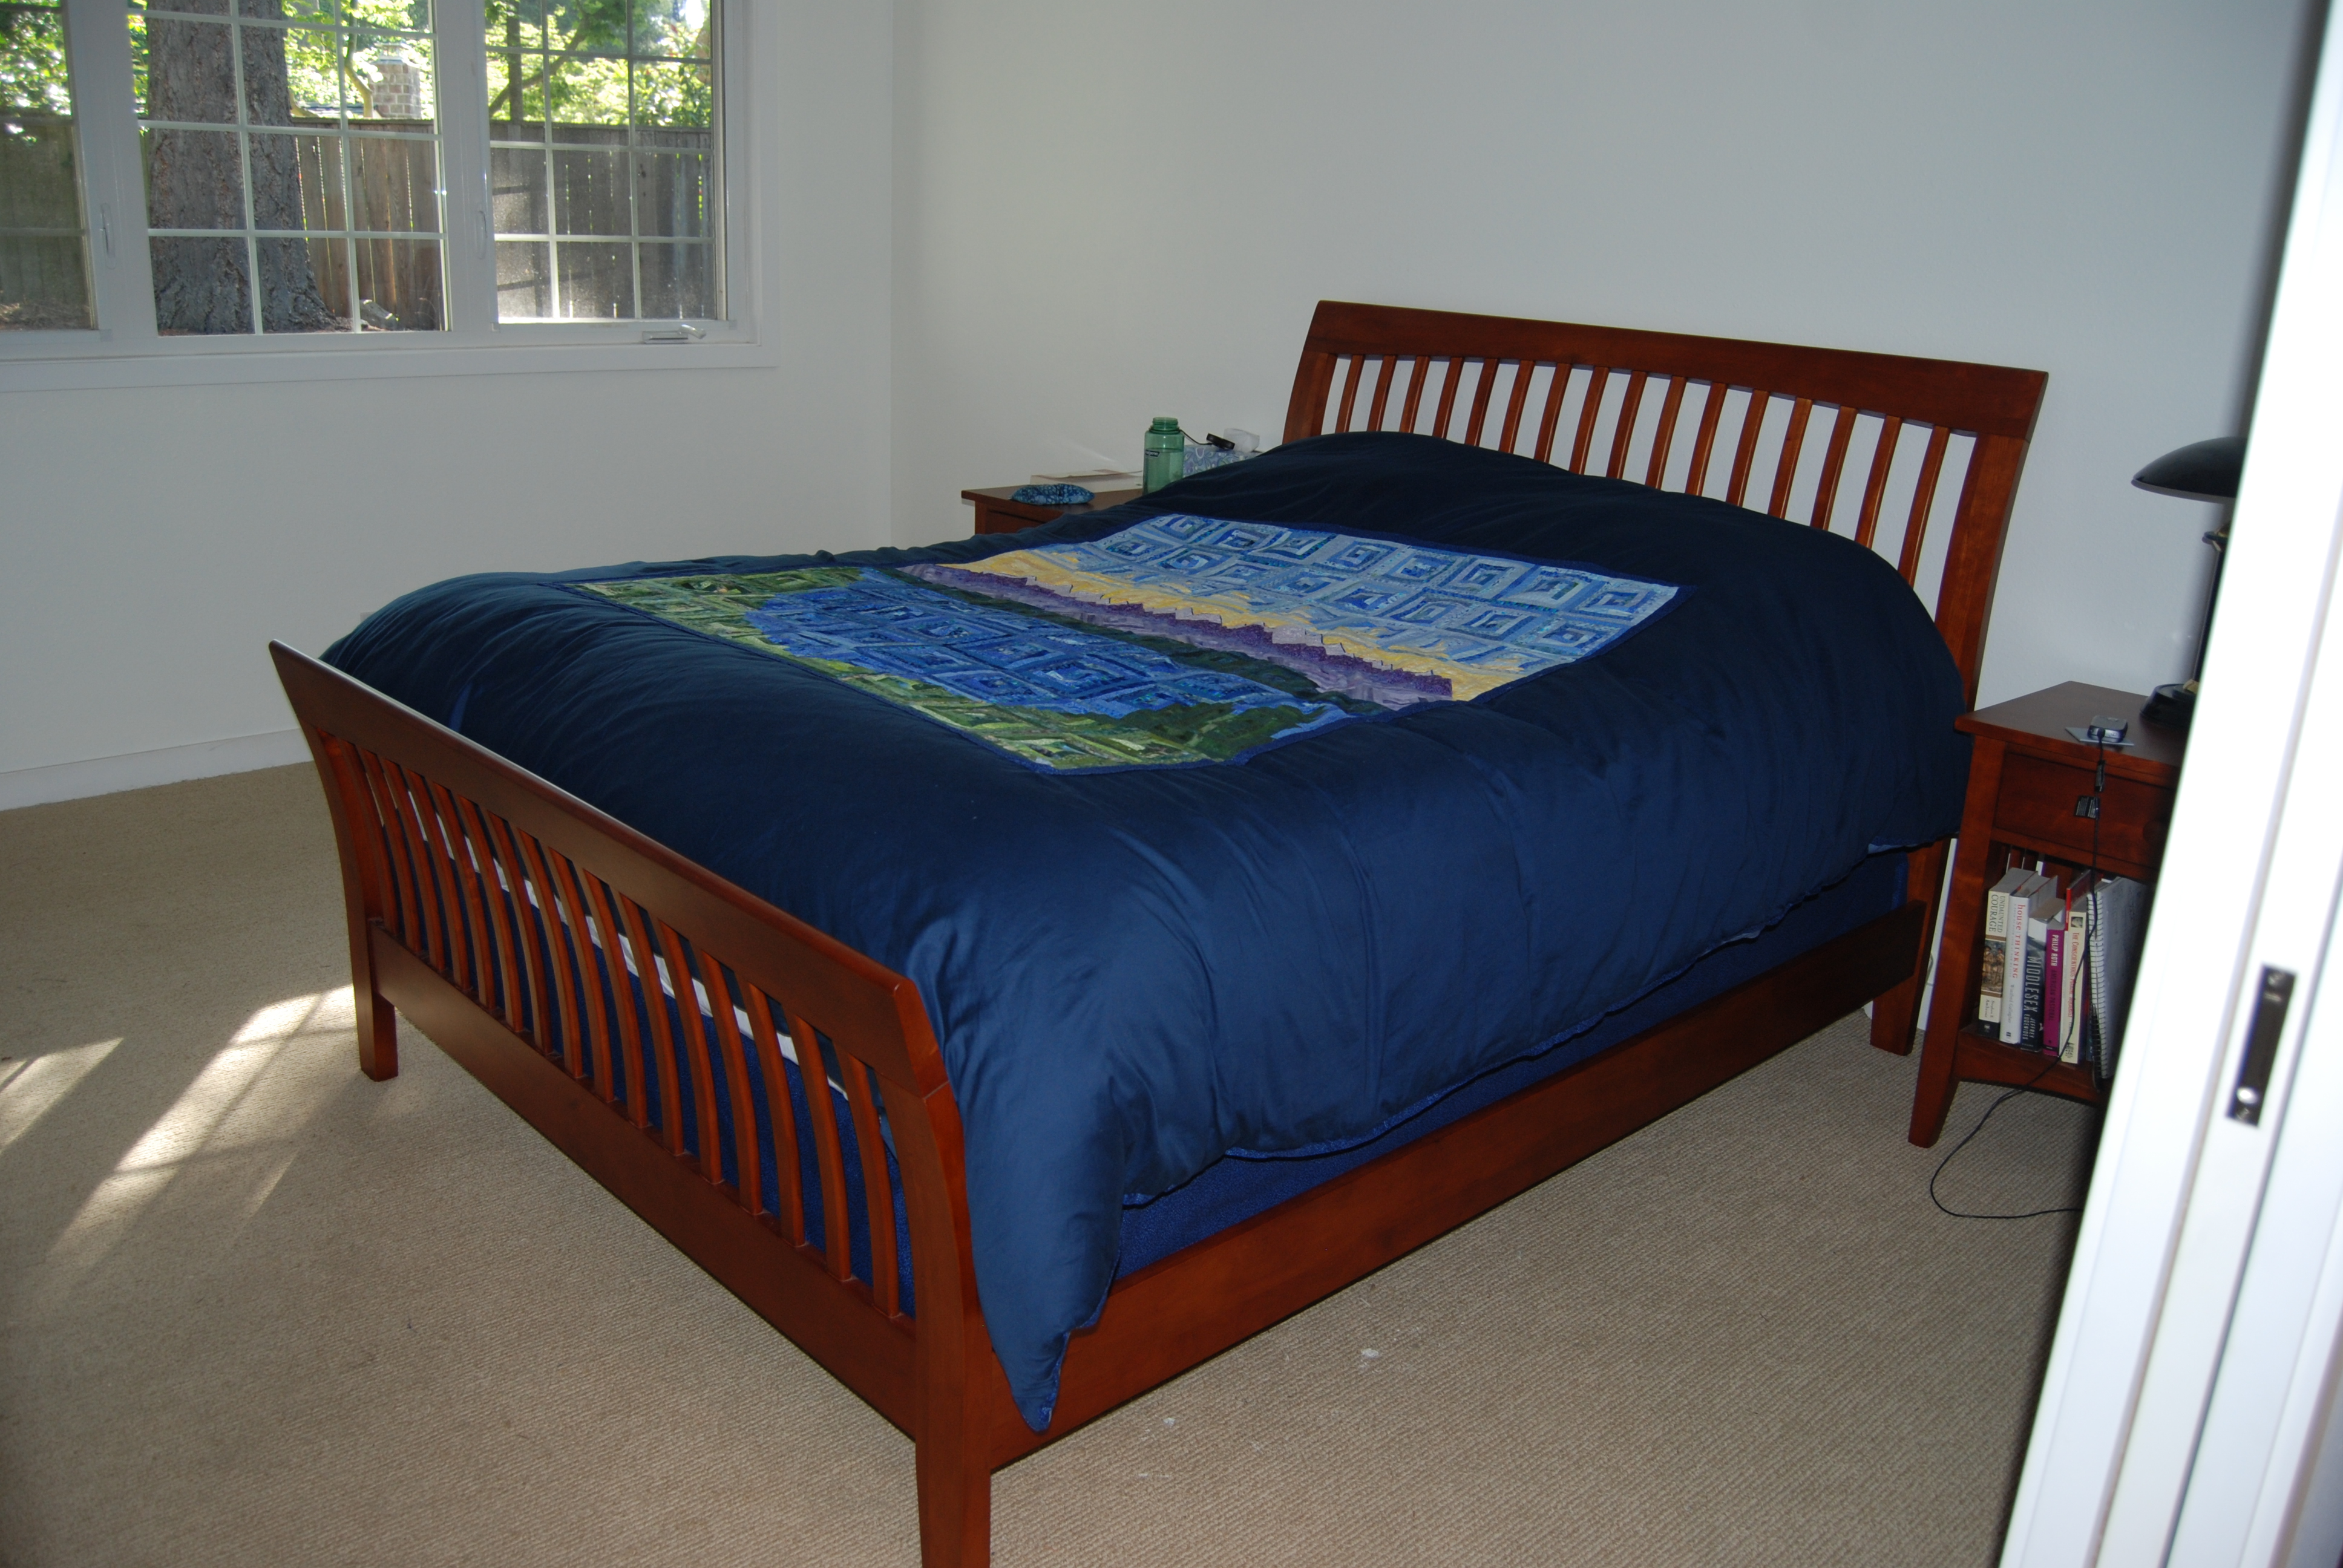
It looks so much more polished, and it’s a great long-term item to finally have off the list.
Quilt sandwich
I basted the baby blanket this morning, and I’m so happy with the medium blue/turquoise bali fabric that I found for the back.
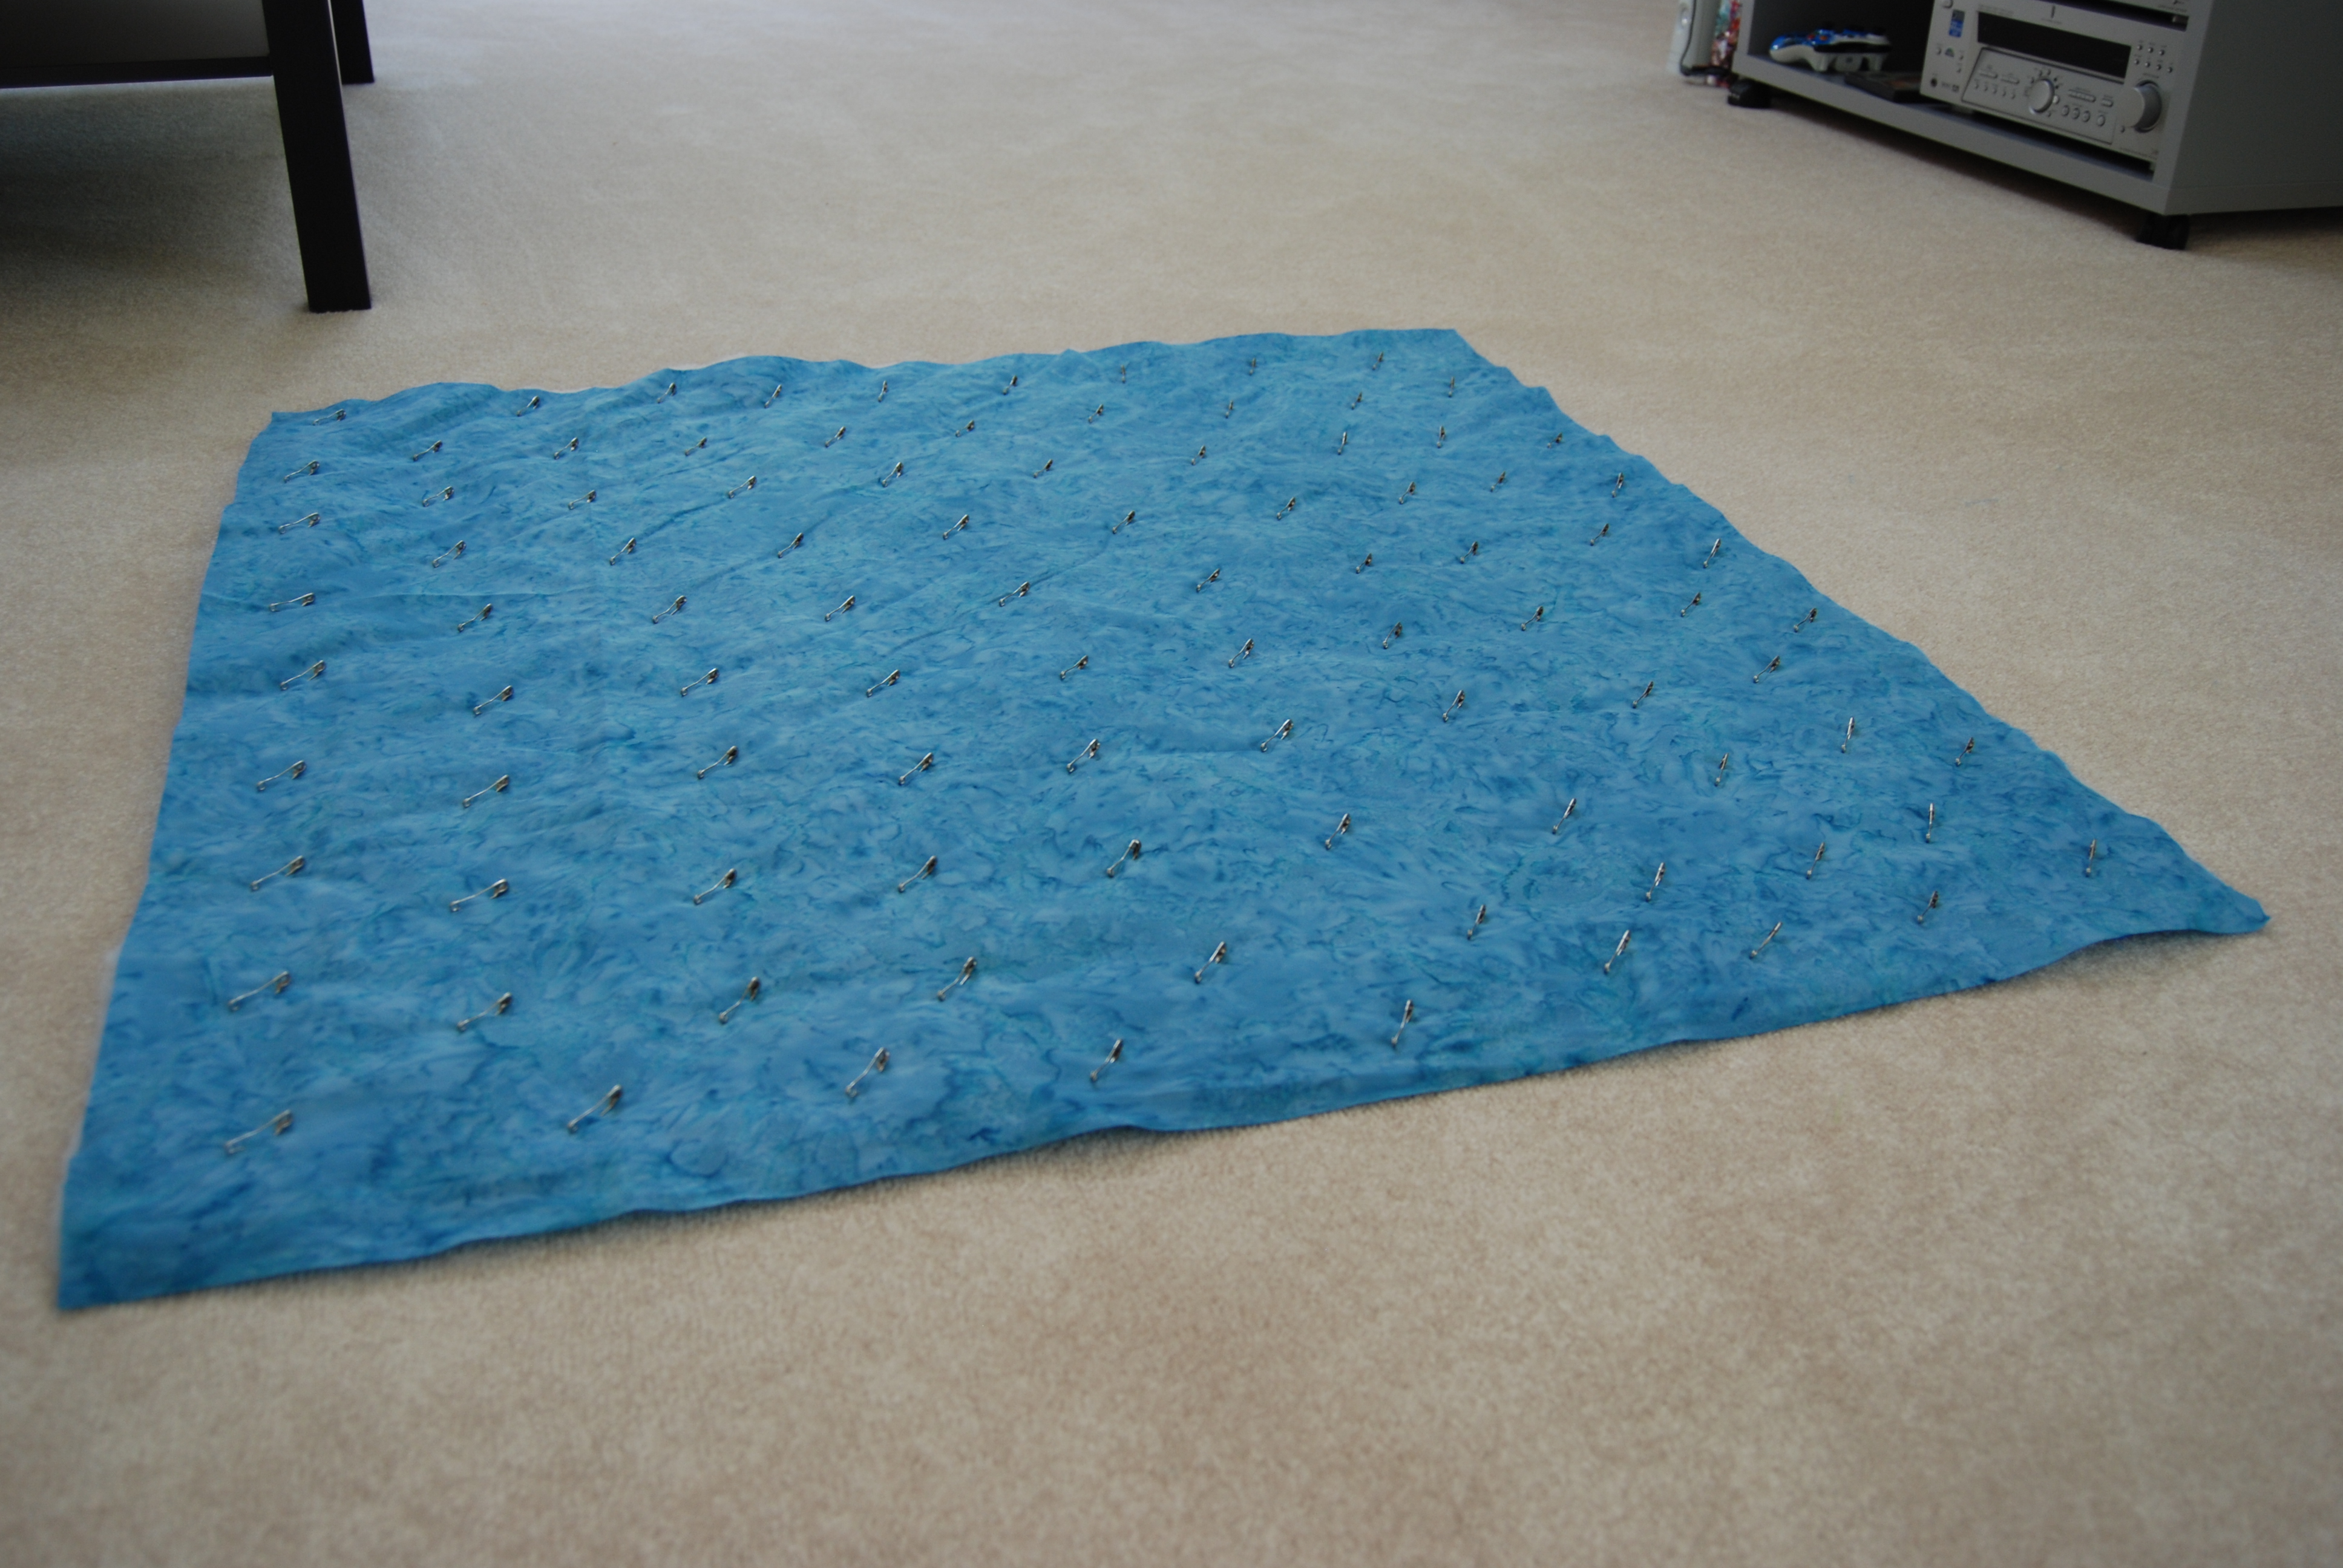
The quilt front came out to what seems to be a perfect 36″ square, without any trimming. I cut the batting and backing about an inch and a half bigger in case pinning it out revealed some sort of stretch or slant, but now I just have a neat border to trim once I’m done quilting. I was having trouble settling on a quilting pattern that felt right, but I’ve come up with a concentric circles plan that I really like. Can’t wait to see how it works out. I found a fabric pen to mark out the lines (a bigger achievement than it sounds at first glance – there are so many different options), so that’s on the docket for later this afternoon. We’re going to see Up for a Father-to-be Day evening out, so I’m curious to see how much I can get done around that.
Progress!
The quilt top is done for the Bento Box baby blanket!

I’m wishing that I’d used a little bit more of the medium blue, but I think that once the blue binding is on, that will do the trick. I’m still wavering whether to use the fabric I have for the back or to see if I can find a coordinating Bali print, and I don’t have great ideas on how to quilt it, though the size (36″ square) will make the quilting so much more manageable than the daybed quilt was.
Here’s a close-up on one of the corner squares:

Several of the fabrics are the remnants from my Olympic mountains log cabin quilt (that lives on our bed), and it makes me happy to see them in this context.
Quick sewing
The bento box quilt top is coming together so quickly, which is nice because I seem to be getting so sleepy again in the evenings and haven’t had that much time to work on it. I have the right panel finished (shown here on the chair), and am getting closer on the two remaining panels.
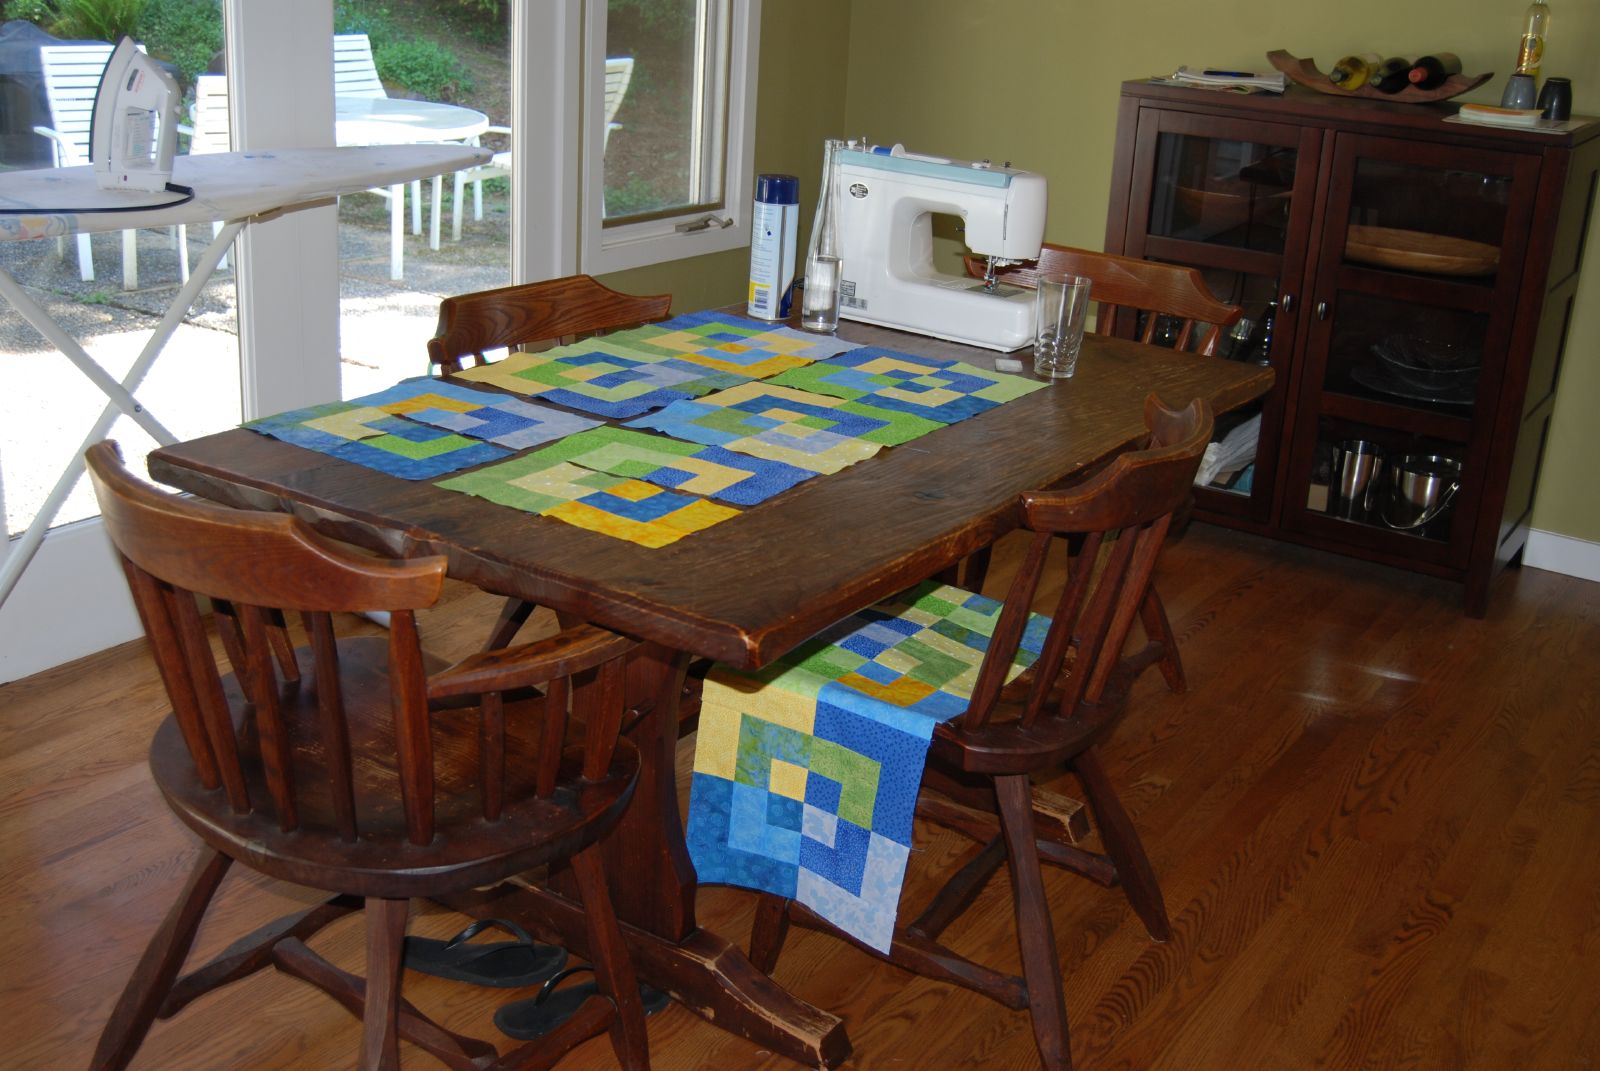
I needed to rip and redo some of my seams so that the blocks would all make nice points (it seems that even with my ¼” foot, I still managed to get pretty far off on some of those seam allowances), but it’s gratifying to have such a fast, pretty project.
Weekend quilting progress
I’ve been looking at lots of bento box quilts trying to decipher what makes some blocks work so well (clear center rings), and some so poorly. (For a reminder of what the pattern looks like, see my old post here.) Each square contains an internal L against a background color, and you assemble four squares (with the Ls rotated appropriately) to make a block with a ring. From what I can tell, there seem to be four rules:
- The two background parts should have the same fabric.
- The diagonal squares of a block should not have the same backgrounds/Ls.
- The diagonal squares of adjacent blocks should not have the same background.
- The L and the background need to be different colors or tones.

The tone vs. color issue is interesting. I took a picture of my fabrics and transposed part of it in black and white so that I could see the darker vs. lighter fabrics. Isn’t it kind of surprising that that yellow on the far left is one of the darkest fabrics? And that that second green is so much darker than the two to the right of it?

Since I need 36 squares and I have 12 fabrics, I started by cutting pieces for three backgrounds and three Ls per color. (There was some fudging, since I didn’t have enough for three and three of all of the fabric options.) I love the way the piles of pieces look, waiting to begin sewing.

I cut all of the pieces for the quilt top on Saturday morning, and then sewed the squares together in batches on Sunday.
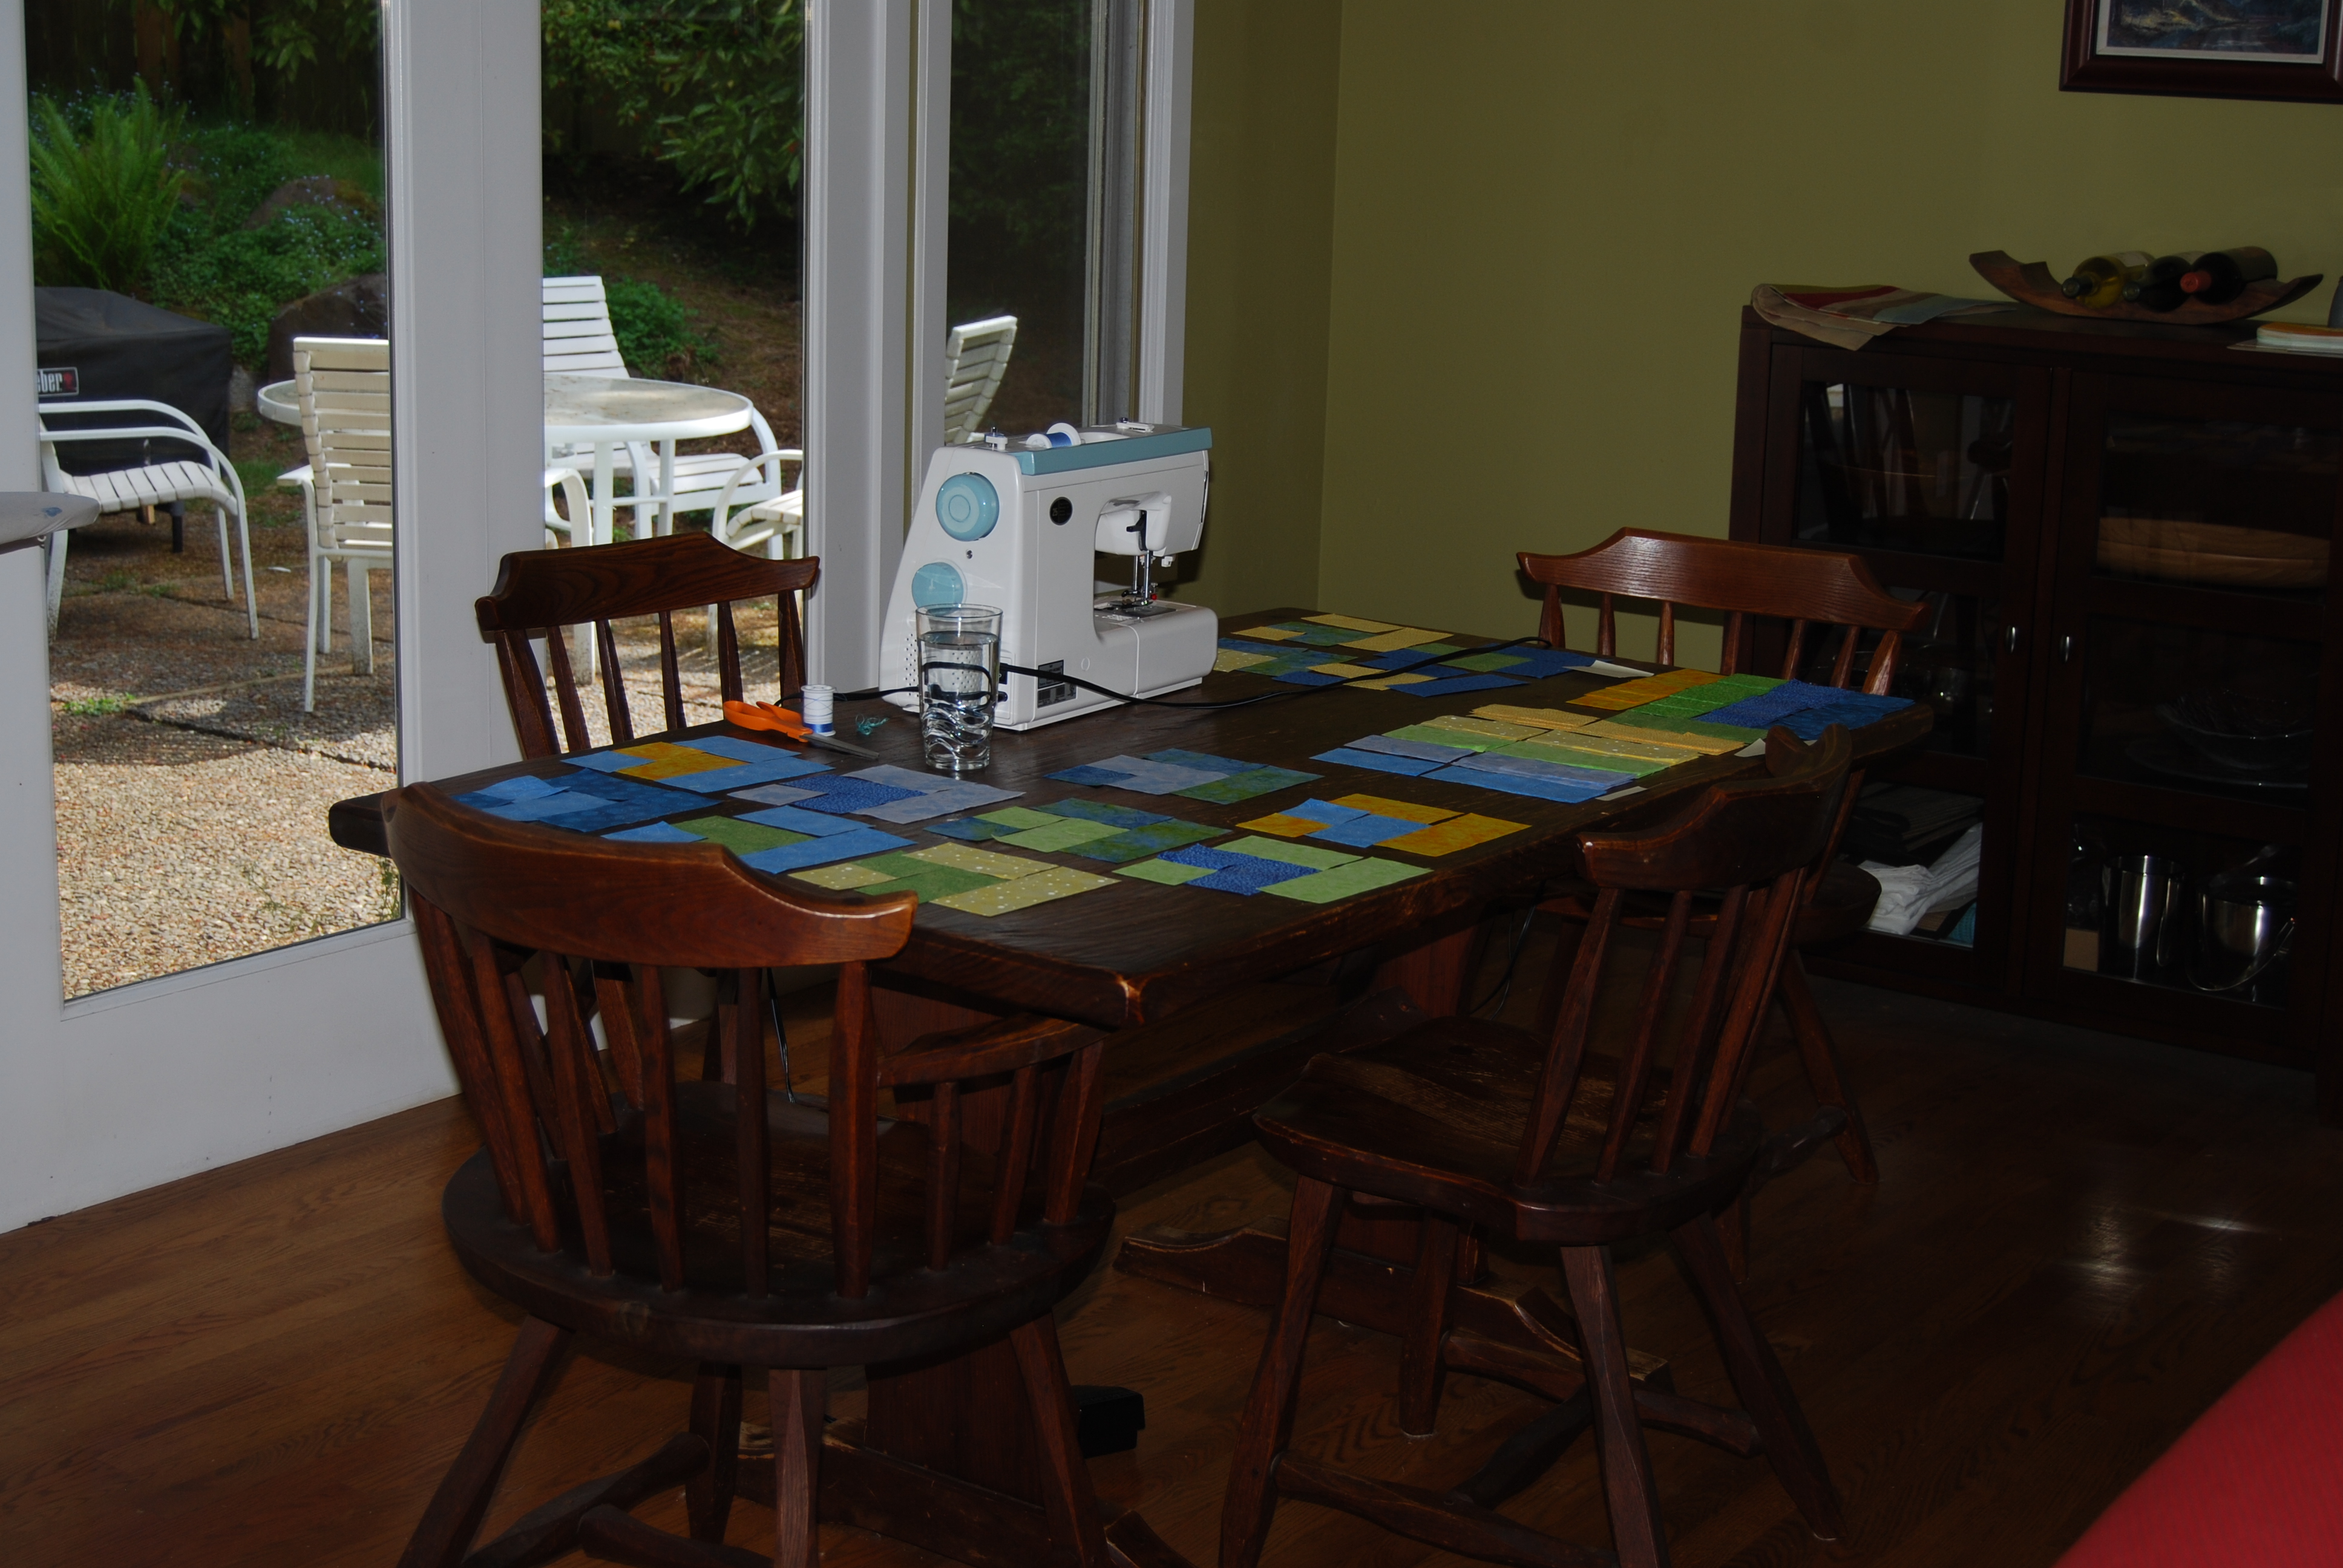
Next up is figuring out the placement of the squares and seaming the top together. It’s so satisfying to be making progress so quickly – it’s a speedy pattern, and the small size helps, but I also think I’m getting better at organizing my sewing before I start.
On your mark…
Before we left for our trip, I finally went out and found fabric for the bento box baby quilt I’ve been mulling. I found two spools of ribbon that seemed like ideal color inspiration: lemon, lime, turquoise and light blue.

I’m delighted with my fabrics for the front.

And I love my back fabrics, too, (shown here with the iron for size reference) but the jury is still out whether they are too saturated. My thought was that I’d make little orange and yellow nine-patch grids scattered across the blue, but it may be too bright. I’m thinking that I’ll make up both the front and back and if it’s not working in combination then I can sub in a lighter color for the back panel.

The fabric is all ironed and waiting for me to start cutting — I can’t wait to see it come together.