Project-happy

After a decent stretch of keeping things relatively low-key, I seem to be accumulating quite the project backlog all of a sudden. At the top of the list are planting veggie and flower seedlings, whipping up a bed skirt, recovering the two butterfly chairs in the family room, finishing two knitting projects (the baby surprise jacket, and my long-abandonned Sunrise Circle Jacket) and sewing buttons on two sweaters, and reseeding the front and back lawns.

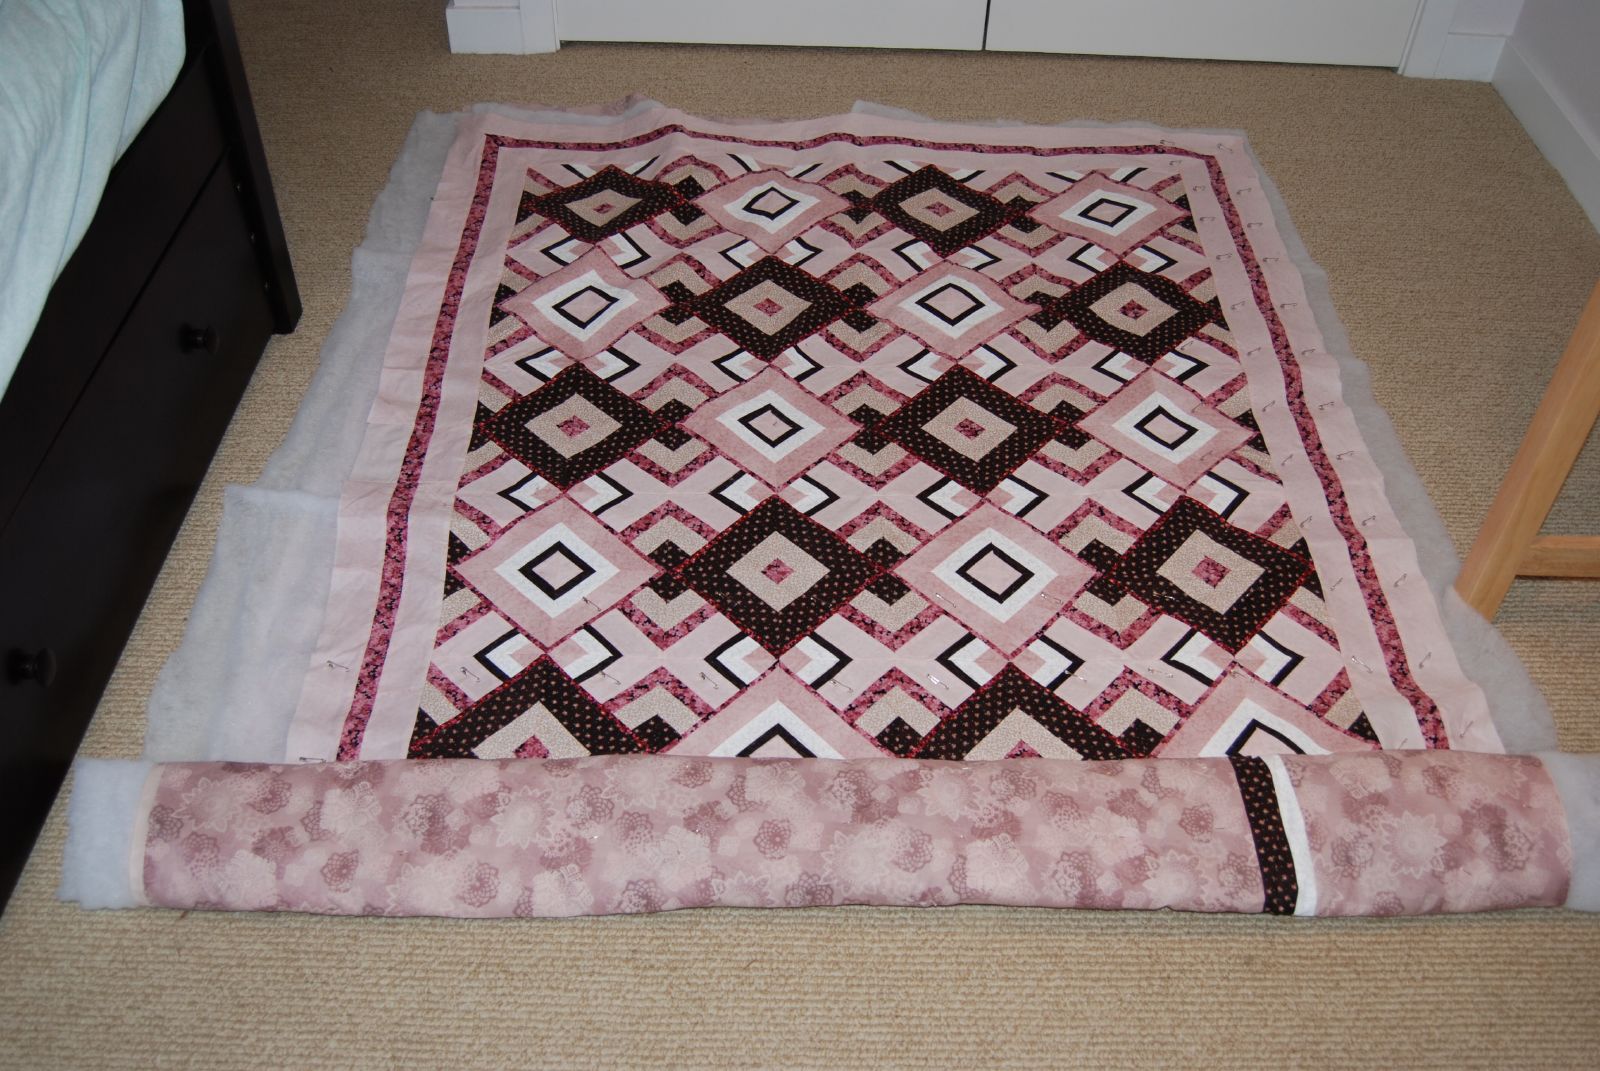
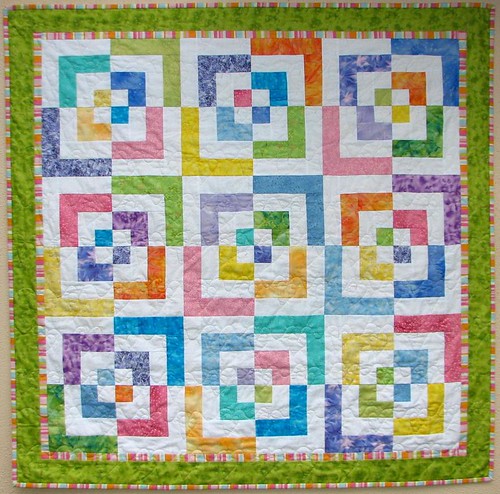
Now, since I clearly have free time to burn, I keep thinking about baby quilts. 🙂 The leading contender is the Bento Box pattern — the piecing is quite simple, but some of the fabric combinations are spectacular. I don’t have a color scheme in mind yet, and I’m not sure whether the baby pastels or some combination of brighter/starker fabrics would be better. Just starting to ponder the possibilities.

Stealing photos from other people’s flickr sites, some notes/thoughts:

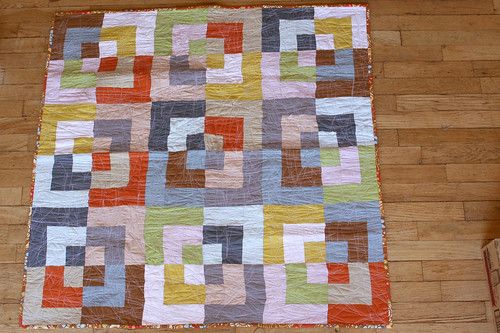
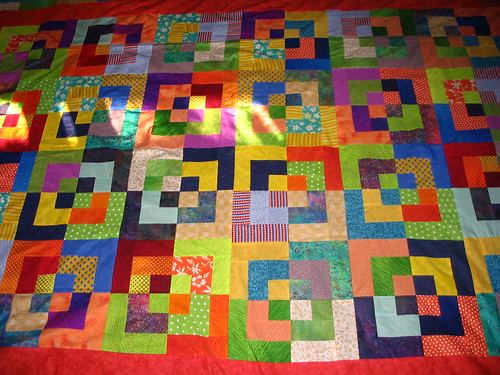
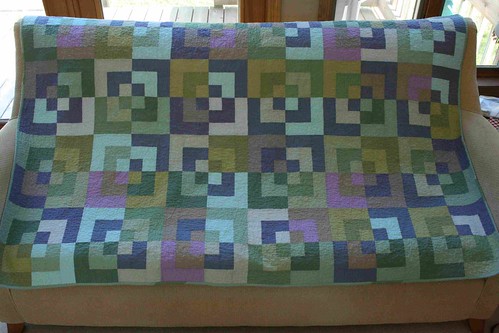
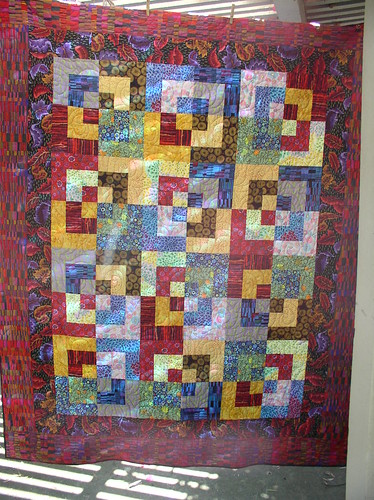
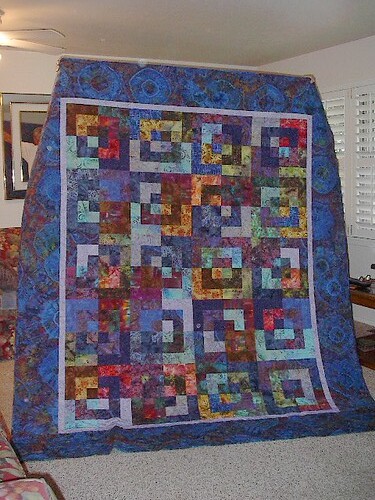
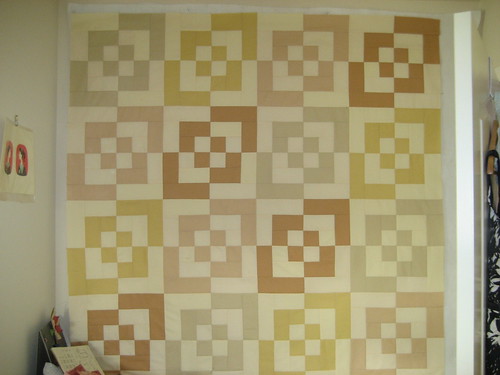
These color combinations are great. The muted blues/greens/browns are definitely what I associate most highly with this pattern, but some of the other combos are equally appealing.

Bento Box Close Up Blue Bento Box quilt bento box quilt
Bento Box Quilt Bento Box Quilt bento box top 1 quilted

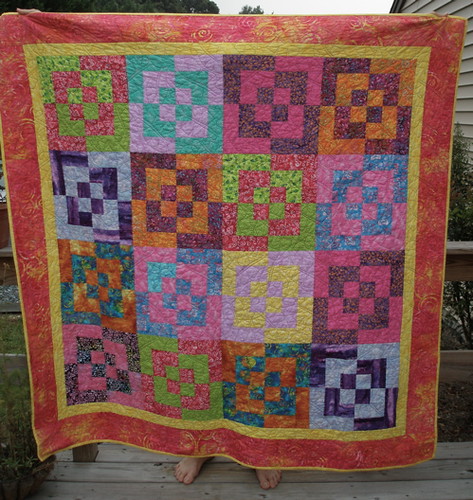
I like the 3 level squares (inner, middle ring, outer) best. The four square ones are still neat but I think you lose some of the power/simplicity.

Quilt # 2364 (Sue's Quilt)

There seem to be three main ways of assembling squares:
Opposites – two colors per set of four blocks, diagonally self-mirroring:

bento-box-quilt bento box Quilt Pink Show and Tell 04

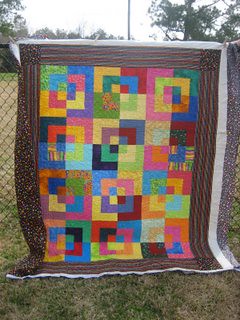
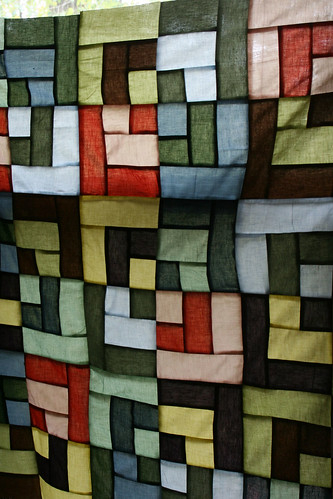
Random – you see the L’s but somehow they don’t really come together into rings:

bboxstanedglass2

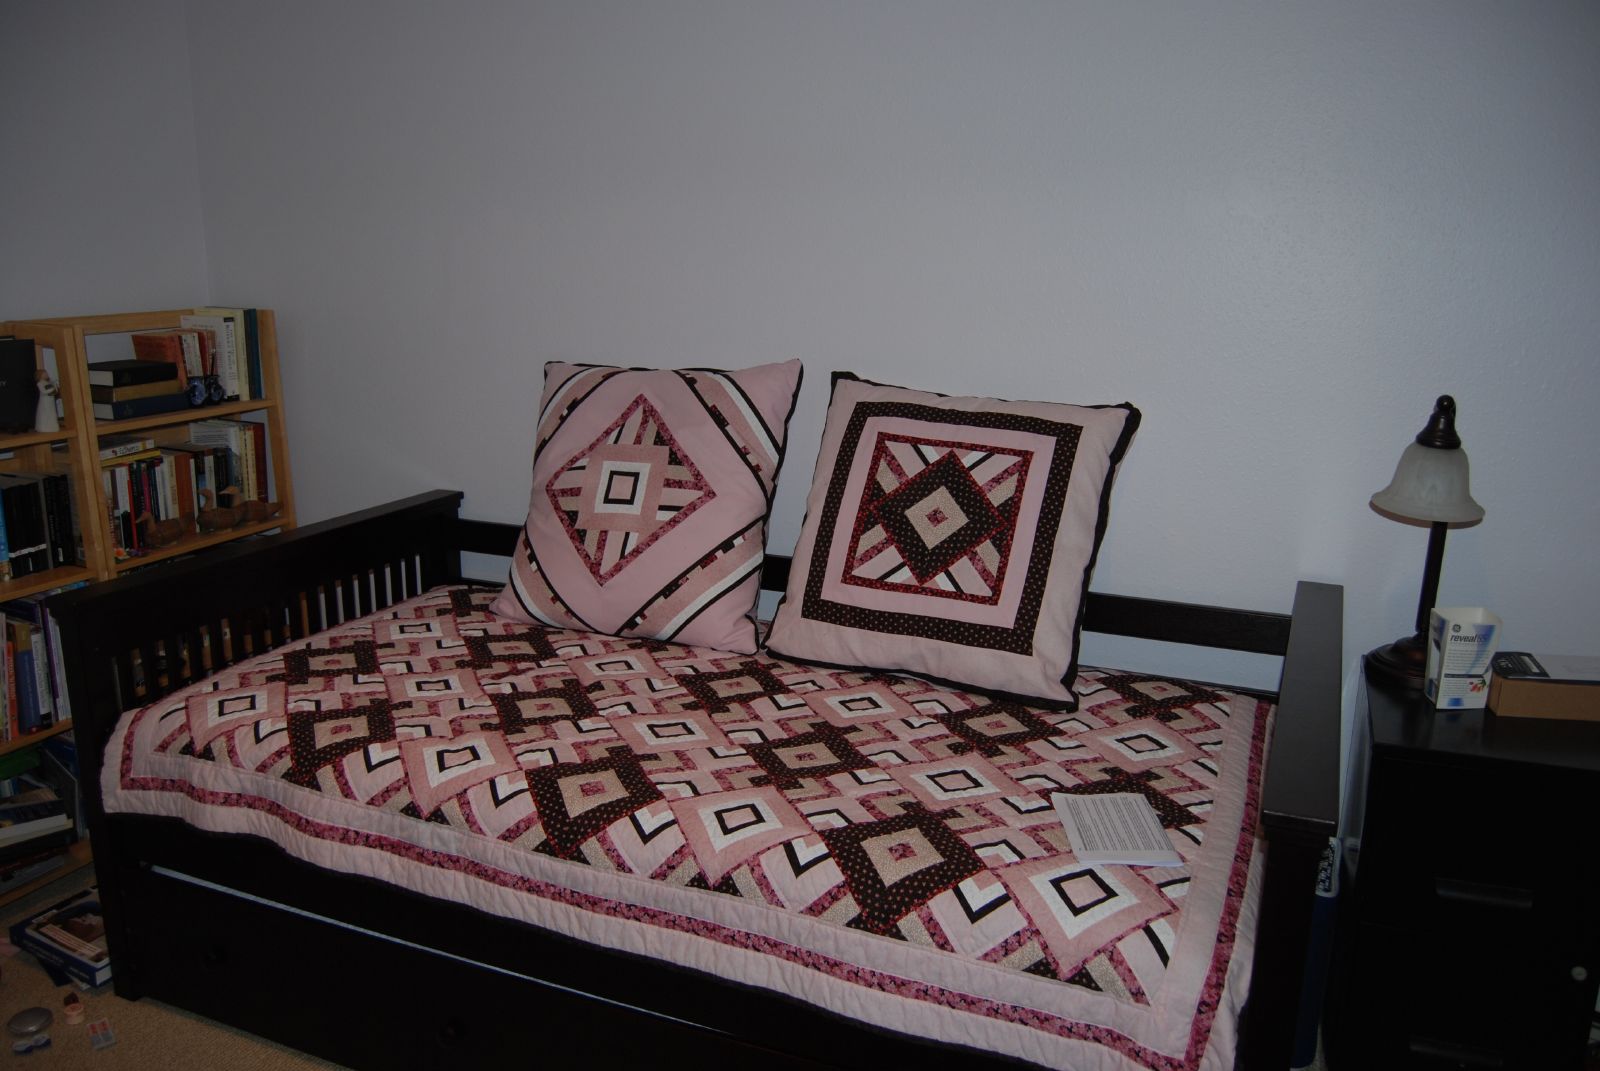
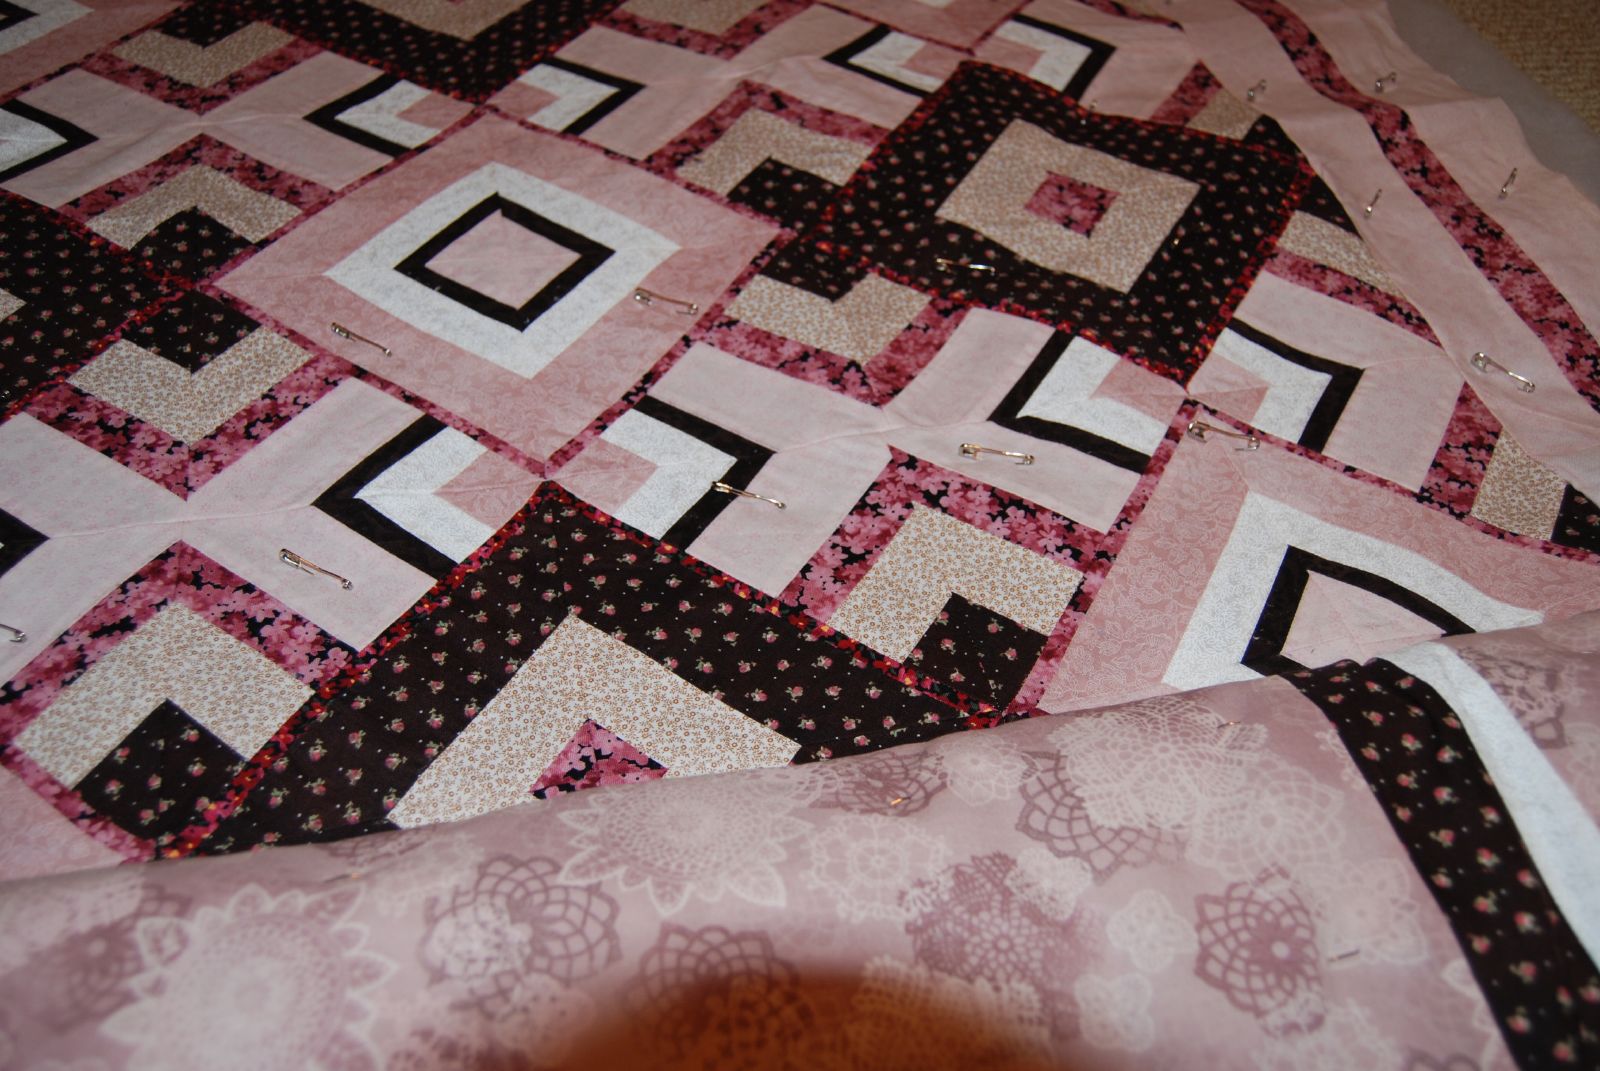
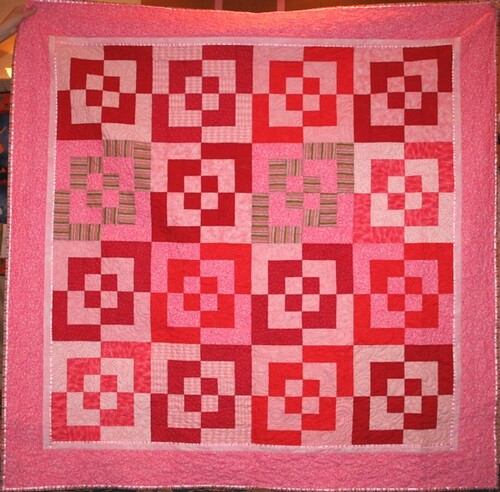
Rings – the Ls come together to form a ring that really stands out and provides structure:

bento box - finished!

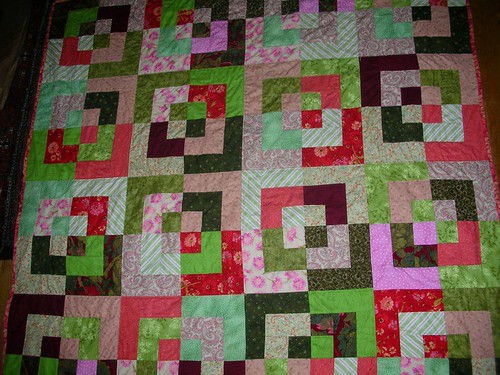
Each are pretty in their own way, but the rings are the ones that impress me the most. Most quilts seem to end up a mix of the random and the rings – it’s hard to find examples that are purely one or the other. Some blocks just seem to come together more successfully than others. I’ve been trying to figure out what differentiates the Ring blocks from the Random blocks — tone of the center fabric compared to the exterior/interior? Using the same fabric for at least two touching center stretches? Color? Pattern texture/density? I haven’t figured out the trick yet, but it’s definitely something to decode before deciding on fabric.

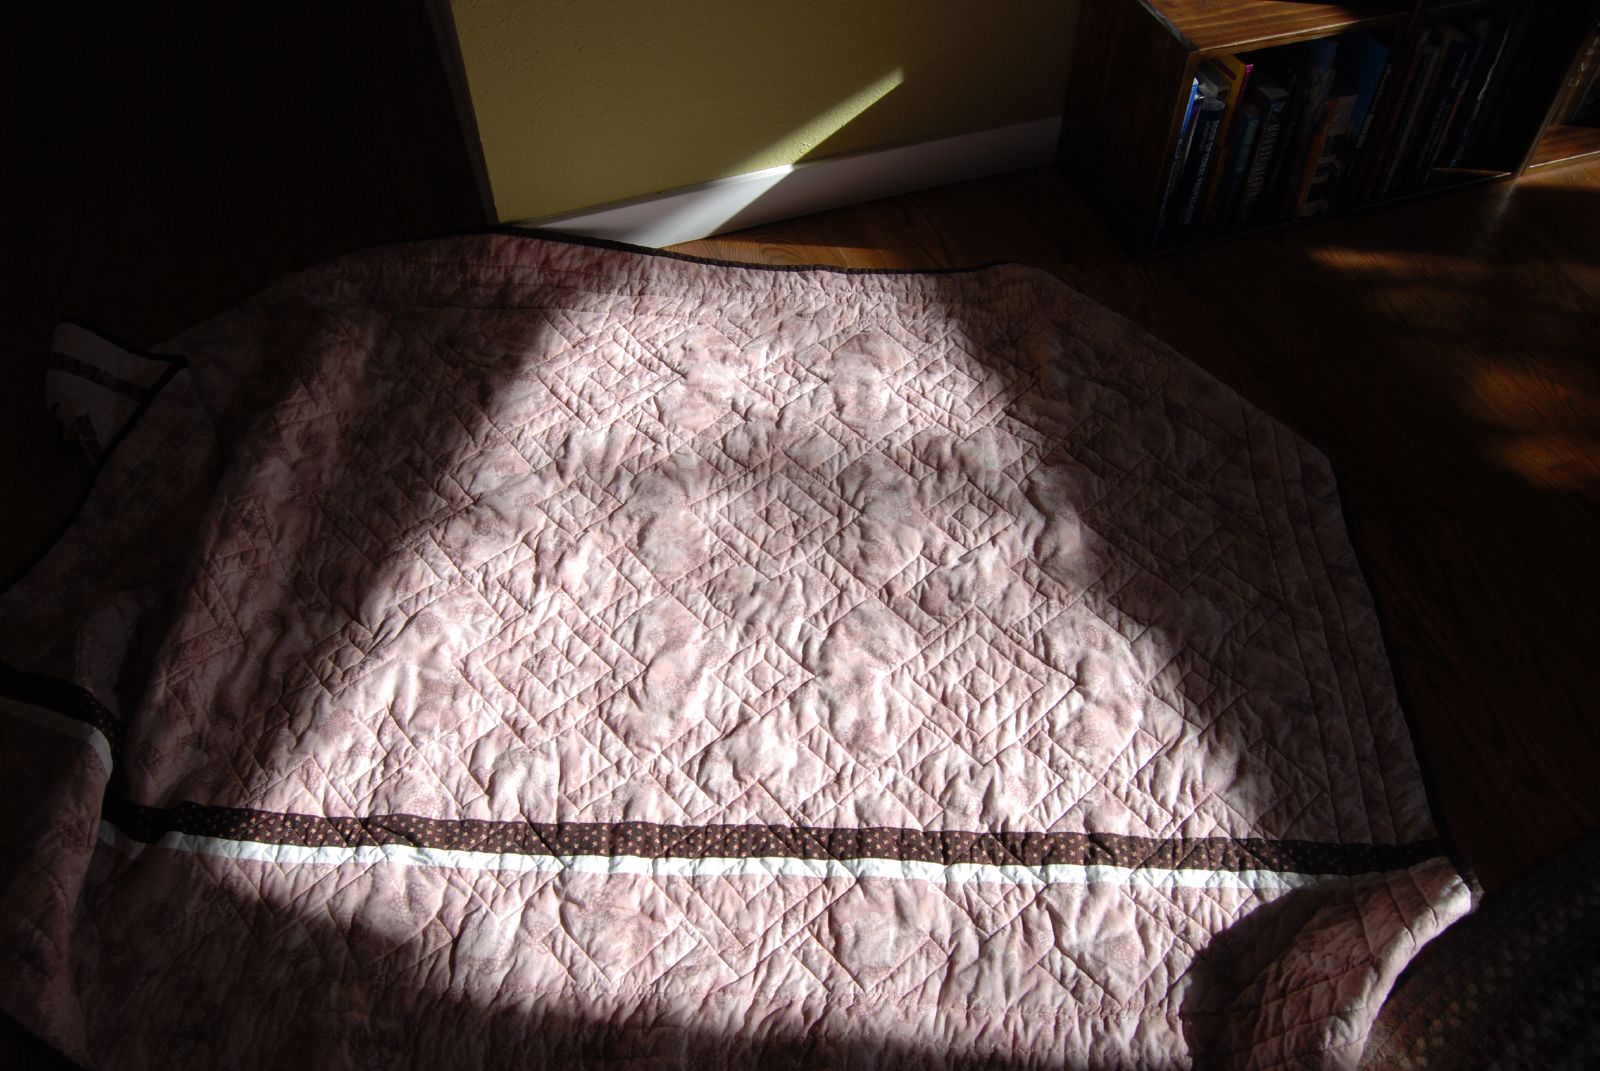
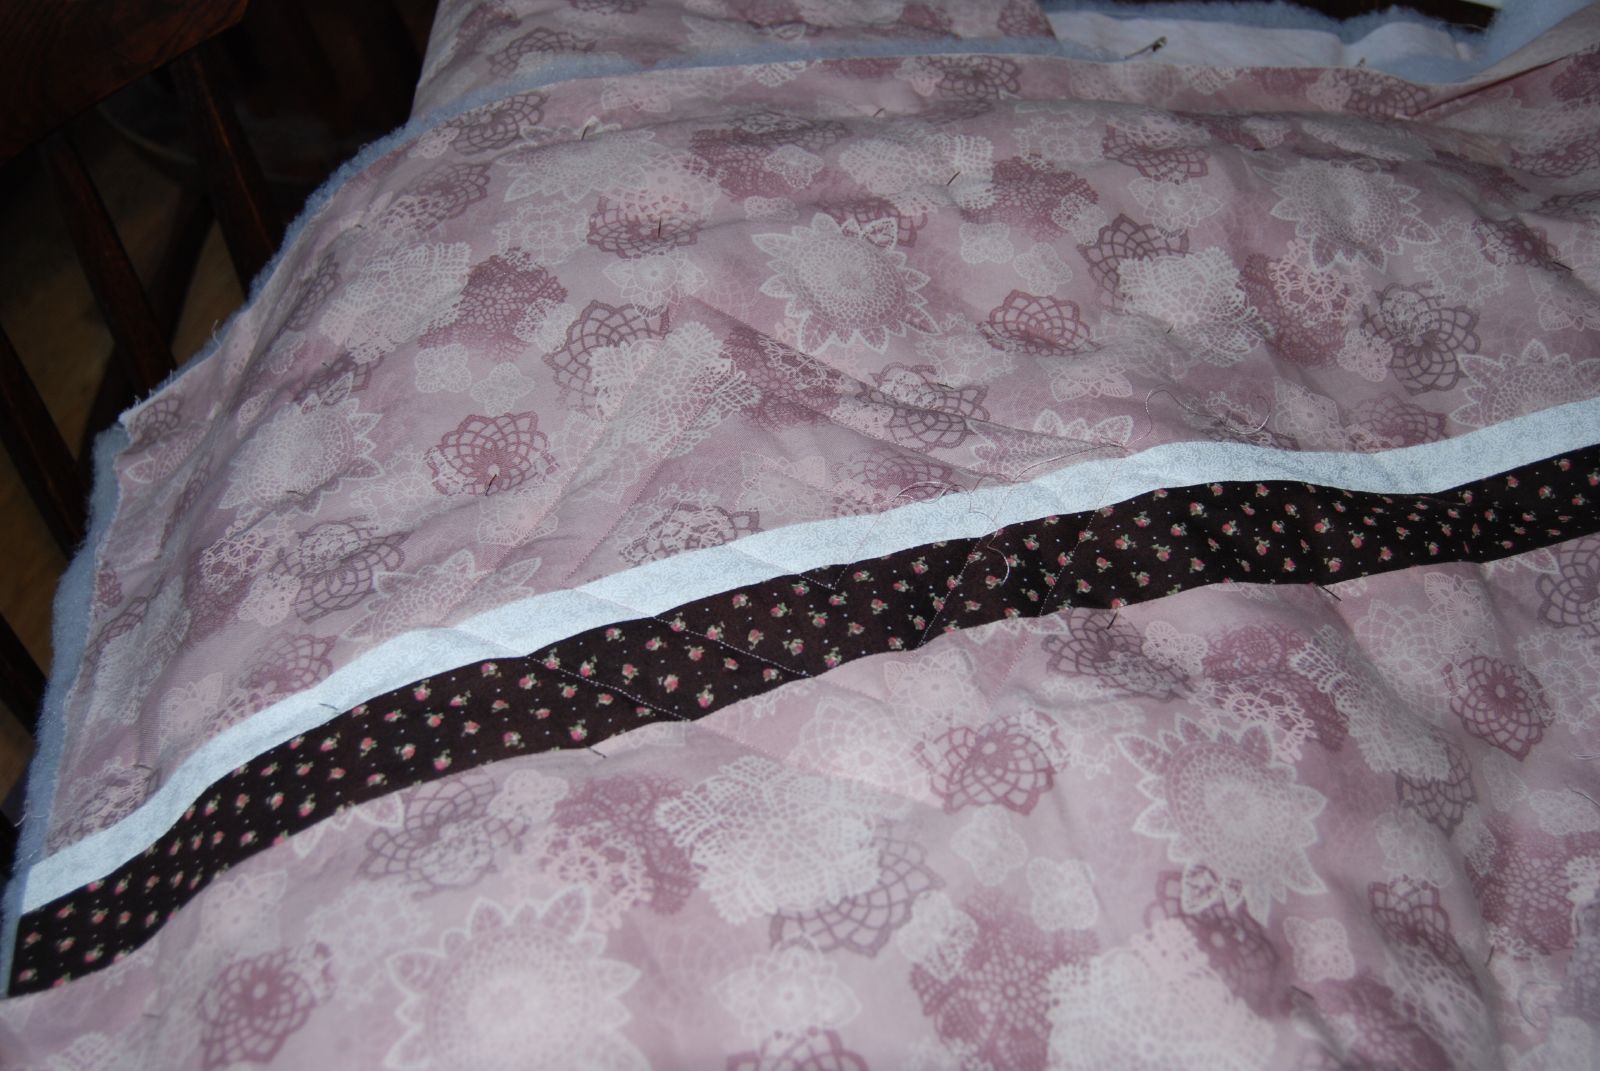
Finally, the quilting on this one is amazing:

Pillows!

I finished the two pillows for my room! JoAnn Fabrics had 24″ square pillow forms on sale (only $8!) a year ago, and though they seemed large it also seemed like a good back support for reading or watching tv on the daybed in my office.

When I started the quilt I did two sample squares to test out the pattern. I decided to tweak the size of the strips, so I couldn’t use them in the quilt itself but I wanted to used them in coordinating pillows. The best way seemed to be to add sequential borders. I’m fine with the diagonal pink pillow, but I really like the square red one (much better proportions and color contrast). Fun. 🙂

I also like the ¼” flower detail on the back of each strip. I used my sewing machine attachment to make button holes (with the buttons facing in so that they wouldn’t scrape against the wall or catch on the bed frame) – a fun detail and the cases are staying in place well.

I’m about 90% satisfied with these. The pillows are about 6″ too big visually (though they are very nice to sit against) and the patterns are fine but not my favourites. But still – a project off the long, long list!! Hooray!

Pillows

I have two 24″–square pillows for the daybed. When I was figuring out the Hidden Wells pattern, I made these two squares (they don’t quite match the quilt, but they’re close). I added a border of floral fabric. Here are the two squares at 12½ x 12½”.

My plan is to put the lighter one on a diagonal and build up around it, and treat the darker as a square and build around that.

I love this fabric, but I can’t wait to have it all folded away in the closet, and be done with the whole project.

Hidden Wells quilt

I finally finished the Daybed Quilt!!

I finished sewing the trim on Tuesday night, and then spent Wednesday night and the last few minutes before James and Thanh arrived on Thursday sewing in all of the thread ends from the quilting. I washed it (to removed all of the starch, and to give it that wrinkly look), and it was finished in time for their stay. Yay!

I’m very pleased with the way it turned out. The trim, especially, is gorgeous to me, and really frames the quilt well. Here’s the top:

And here’s the back:

You can see the quilting pretty well (especially if you click for big), and I got another closeup picture of the quilting in the sunshine:

The pattern for this was Hidden Wells. My full log of blog posts is here. It was a slightly unusual project because it reminds me of so many other people. I bought the fabric with a Christmas gift certificate from Kevin’s sister, I started starching and piecing all of the fabric when Amanda, Brian and Lily were here, and the color combo now makes me think of Kevin’s mom because she was so enthusiastic about it. It’s neat to have all of those associations. 🙂

Slow progress

We’ve been going out all week to watch the Red Sox games (we don’t get TBS), and when we get home, I’ve been working on my quilt binding.

I used this tutorial (this one had prettier formatting, but I prefered the way the first one handled the starting edge.) Both of these were recommended by Crazy Mom Quilts, who’s been churning out tutorials of her own all year. Creating the binding and machine sewing it went quite quickly, but handsewing the back edge is massively time consuming. I’m gradually getting faster, and I’m about 75% of the way around, but it’s already been an eight hour project. Whew! It’s so incredibly crisp and pretty, and I can finally see the light/finished quilt at the end of the very long tunnel, so it feels worth the effort.

Almost there!

I’ve been working like mad on all of the quilting for the daybed quilt, recently.

I’m definitely clear that I’d never do quilting on more than a twin quilt on my home machine – it’s rather unmanageable.

That said, this pattern is basically optimal for it – all straight lines and angular. It took a little while for me to figure out a quilting pattern that was relatively symmetrical itself but still accentuated the top, with the non-uniform different squares. I’m really pleased with the design I settled on, and it was a pretty simple thing to quilt. Here’s a sketch (red is the pieced pattern, blue is the quilting):

Now I have to cut trim, sew it on, and them hem the second edge by hand. Getting close!

Quilt happy

When I sat down on Saturday afternoon to work on the daybed quilt basting, I ended up taking out about half of the pins. I’d pinned three lines along one long edge, and then worked in horizontal strips from the top, and when you held up the quilt that section had a marked sag, and pull on the fabric all the way along the pins. (You can see how crumpled and biased the fill was, too, in the previous photo.)

Once I’d removed about sixty pins, I smoothed the backing, smoothed the fill on top of it, pulled down the quilt top, and then set again to the task of pinning. This time, I was really pleased with how flat the fabric/fill/fabric sandwich was, and I was feeling proud when I finished. But again, held it up and there was a saggy 9″ wide horizontal band in the backing, where I’d folded the quilt to fit it into the available carpet space in my room. Oops.

So then I finally ditched the plan of listening to NPR as I worked (computer streaming), moved to the family room’s lush, huge carpet, took out about a hundred pins, resmoothed, repinned, and ended up with this:

It’s gorgeous. The redos were annoying but completely worth it (I didn’t really hesitate – better to pull out pins than rip out stitches, or even worse, to hate the finished quilt). The new quilt sandwich is *flat* (aka, hopefully it won’t pucker when I start sewing). The backing is going to be a little bit crooked, but (a) it’s the back, and (b) I’m completely willing to chalk it up as a sign of quilt character. No complaints.

I cleared off our table to start quilting.

I’m working on my sewing machine, which is going to be interesting. (Machine quilting is easier on a quilting machine, which has a much longer arm so that the fabric doesn’t have to get all bunched when you swing it to the right side of the needle. ) I’d read advice on one of my blogs to make use of backstitching instead of turning the whole quilt. It works pretty well, but I find steering the quilt with only my left hand (while my right holds down the backstitch button) very challenging. Some of those backstitched seems are NOT straight!!

My first round of quilting will be to “stitch in the ditch” around the pink squares. I sewed 4 squares yesterday; my photo of the front didn’t come out, but you can see one of them well on the back:

After that, I want to do the same around the brown squares(brown thread for the face, the same pink for the back, I think). I’m still debating what to do in the middle – I don’t want to highlight the non-symmetric nature of the down areas. Maybe a double diamond in the middle of the light pink x’s? I’d like to do some sort of ivy pattern down the legs of the x’s, but it seems like a disastrous plan given the sewing machine…? I might feel more confident later, we’ll see. For the trim, I found a stencil with a repeating flower pattern that I like a lot, so I plan to do a double band of that in each of the light pink strips.

Neglected projects

I haven’t forgotten about the Hidden Wells quilt for the daybed; I was just gathering steam (for several months) to work on basting it. The back, fill, and pieced top all need to be held together so that I can quilt them.

Last night finally seemed like the time, so I started. I only got about half way, though, before running out of safety pins.

Frustrating! (Though the work I did was sufficient to create a semipermanent safety pin-shaped groove in the tip of my index finger from all the closing.)

The pins are slightly unusual and bent at a 30° angle so that they hold the layers without stretching them. Here’s a closeup of them in place:

I’ll have to go buy another set or two so I can finish up.

Belated progress

I finally got over my discouragement, ripped out the offending seams, starched all of the pieces, and am re-attacking attaching the trim for the daybed quilt-top.

I’m four seams in, and some of them weren’t properly aligned so I clearly have another date with the seam ripper in my future. At least I’m finally back on the wagon. It is fun to work on it again.

An utter trim failure

I’m feeling totally thwarted.

I got all geared up after work to finally go buy trim for the family room. We were able to save about two thirds of what we had orginally, and now we have to match the windows, doors and base trim, plus find something to be a shelf on top of the bump-out. All of the existing trim is 9/16″ thick, and most of it is 2¼”, 3″ or 3½” wide. NONE of these dimensions seem to be findable. The guy at Home Depot said that trim sizes cycle in and out of fashion, so we may just be out of luck. I’m skeptical, but concerned. Also, the bump out is 7″ to 7â…œ” (the people who built the room had a very loose interpretation of square…) and boards seem to come in 7 ¼” or 11 ¼” widths, not the 8″ that I want. So, foiled times two.

I really was hoping to buy the boards tonight, cut them all to size with the miter saw (by hand. whew.) tomorrow, paint them on Friday, nailgun them up on Saturday, and then be done by Easter, but this puts a crimp in the plan. I’m going to call around a bit tomorrow before I start getting really discouraged. Keep your fingers crossed.

And I was so close to finishing the top to the quilt, but it looks like I may have measured wrong…

c

… since the trim for each of the four sides is exactly 1 â…›” short. I’m perilously close to running out of the light pink fabric, so I’m letting it marinate for a day before I assess the damage. The trim trends just aren’t running the right direction tonight.