Piles of progress

I’ve finished starching all of the super strips, and cut them into the squares. Major progress!

There’s something about the pile of forty starched squares that just looks so, so monumental to me. Perhaps I’ve just been ironing too long. 🙂 And yet, the impression isn’t diminished when I cut them into triangles (and half of those triangles in half again…)

Daybed quilt

Last time I posted on the quilt, I asked if people thought I should proceed a row at a time, or just stage by stage. I loved the suggestion from the comments to work a row at a time (such measurable progress!) until I tried it – too stilted, and I was getting impatient. So I decided to work the remaining bits in phases. I can always swap to a (faster, easier) row-by-row version if that seems optimal. During the seaming of the first two row’s worth of strips, I felt like if one row went awry, the entire superstrip got all stretched and wrinkly. So, this time, I started sewing all of the strips together in pairs first, and then joined the pairs into larger and larger groups. It may be psychological, but I think it came together better. Here are the initial pairs:

Once everything was seamed, I pressed the seams flat and then ironed in starch. I’ve been using Niagara brand spray starch (it’s what they had in the drug store up the road and it was cheap). I bought a heavy-duty canister and an original one – the heavy duty is definitely the way to go. Original might be better for things you wear next to your skin, but it doesn’t hold the bias edges the way the stronger version does. And, note to self, two canisters would be the correct amount for this size quilt in the future.

Here are the first two rows’ worth of pressed and starched strips:

Starched sets

One row takes two sewn-together rows of strips. You can see the other 6 sewn-together racks waiting to be pressed on the back of the chair.

Still in the Season

A few degrees off kilter, but I wanted to get a photo of the Christmas lights up on the blog.

Pretty! We wanted icicle lights (check) and the new LEDs (check), but we didn’t realize that the resulting light would be quite so blue. They probably look even odder because at a slight distance, the ones above the green garage look blue, while the denser ones against the brick on the house look almost-white. I’ve been a fan since they first went up: the color reminds me unshakably of our fishtank, which I love (Merry Christmas, from the fish!)and they use next to no electricity, and it’s our new house, so.

We’ll probably reevaluate next year, though I could definitely see using them on the back of the house. (They’re actually prettier from the inside looking out than from the outside in, I think.) Kevin was really disappointed with the color at first, but they’ve grown on him too. In any case, a post for the blog before they finally come down.

More snow!

It snowed last night, starting around three, and just kept going. Waking up was fun – lots of snow on the ground, and that gold light coming through all of the lacy tree branches was beautiful.

The walk to work this morning was too pretty: white and crunchy. The snow had clearly refrozen a few times, but it gave good traction for walking. All of the branches were feathered, and as the sun hit them they started to melt, so lots of little showers along the sidewalk.

The street ours connects to was still pretty snow and ice covered, but the main street was clear. My peace kept being disrupted by horrible clanking. Several cars were driving along the bare pavement with chains on. This photo is terrible (into the light and I was trying to be quick and sneaky), but this guy on the left actually had them on all four tires.

Given the amount of snow still on his roof, I’m guessing he’d only been driving for a few minutes, and he had a Microsoft tag on his car, so he got up and put the chains on for his 3 mile drive to work. Typical Seattle.

Coming home tonight, the snow on our street (and yard, and roof) was mostly still there. So lovely.

All gone!

On Friday, I got in to work early for a meeting, and to keep things even, I left work at 4:15. It was still light enough to get yard work done when I got home!! (*Huge* progress – it’s not dark at 3:45 anymore! The light always comes back so much faster in January than it goes in November.) I filled one of the yard waste bins to the hilt, and finished clearing the left side of the brush pile.

The weather cooperated on Sunday – blue and clear, and not even that cold – and so I was able to finish the second bin. I was very proud that all of it fit.

Now on to that monster pile in the back – I’m guessing at least three double-bins for the brush, and then another double bin or two of just limbs. Plus a bin for the Christmas tree. Since they only collect every other week in the winter, that puts us at a min of two months? Not terrible.

Strip 2

Making these squares is like coasting downhill. All of the organization and work to sew into strips, press open the seams, and add starch. But then you cut the stiff strips all up into eight neat piles of triangles, and the rest just flies by.

Here’s the pile of pairs of triangles, waiting for seams along the hypotenuse:

And here, a short sixteen seams later, are the small squares that make up the entire row.

A round of pressing and 16 more seams makes 8 rectangles, after more pressing, it’s four seams to make squares, and a final press and 3 more seams and there’s the strip. Very satisfying.

Two afternoons of work well done

I’ve been wanting to post this for the last two weeks, and the weather keeps being crummy, and I can’t take pictures (either it pours, or there is NO light – those held hostage under the deep, dark Seattle clouds will understand). So pretend this was posted back on 12/27.

When we bought the house, I also bought a pruning book, read it, tried out a few things, and then gave up and decided to wait for better instruction. Kevin’s dad is an arborist, and both of his parents are gardeners, and so we and our yard have been waiting with high hopes for their visit. We weren’t disappointed. Our three fruit trees were massively pruned (and did they ever need it!), five pine trees and the half-rotten enormous leaf-producing monster tree outside the kitchen window were de-limbed, and our shrubs have been taken from unwieldy monsters into much more manageable creatures.

Kevin’s dad was impressed (to put it mildly) by all of our moss, but once he adjusted to see past it, it was a treat to watch him work. As gifts, his parents brought out a handsaw, many yards worth of screw-together poles, a saw attachment, and a neat little pulley-operated clipper attachment. In two full afternoons, we learned a lot about what to cut and how to go about it, but the best part was watching Kevin Sr. confront the branches on a tree.

The tree on the side of the house, for example, stands in the 3 yards between our neighbor’s fence and our house, looming over the plate glass window and the kitchen garden window. (photo from early November)

Working from a ladder and then from the room, he gradually took down about 2/3 of the tree, dropping all of the limbs down onto the same 2’ stretch of walkway. (after-photo from the opposite vantage point):

Same with the fruit trees – 20’ branches consistently avoided the two fences, the neighbours’ yards, and the squashable surrounding shrubs.

Kevin got to “raise the skirts” on the back five pine trees, though with slightly less grace. 🙂

I spent more time on the fruit trees and the shrubs, and cutting up enormous falling limbs with the handsaw. We amassed QUITE the brush piles. The main one is on the back patio

and the auxiliary one is by the six-foot-tall side fence.

The plan is to try to get rid of the side pile via our semiweekly yard waste collection, and then possible rent a chipper for the enormous guy out back. Good luck, us.

The two biggest successes were the tree out front by the driveway, and the fruit tree right out back. Before, the pine by the driveway hid the house almost completely from the street.

Whereas now, you can see the roofline! Kevin’s dad took the branches up the trunk about 8 feet (and it seems like more from the ground, since the limbs drooped so much). The front yard is so much lighter!

For comic relief feel free to ponder the mass of the branches removed vs the two 96-gallon, black yard waste bins to the right of the garage. Ha, ha…

You can see all of the cuts on one side of the trunk from this photo:

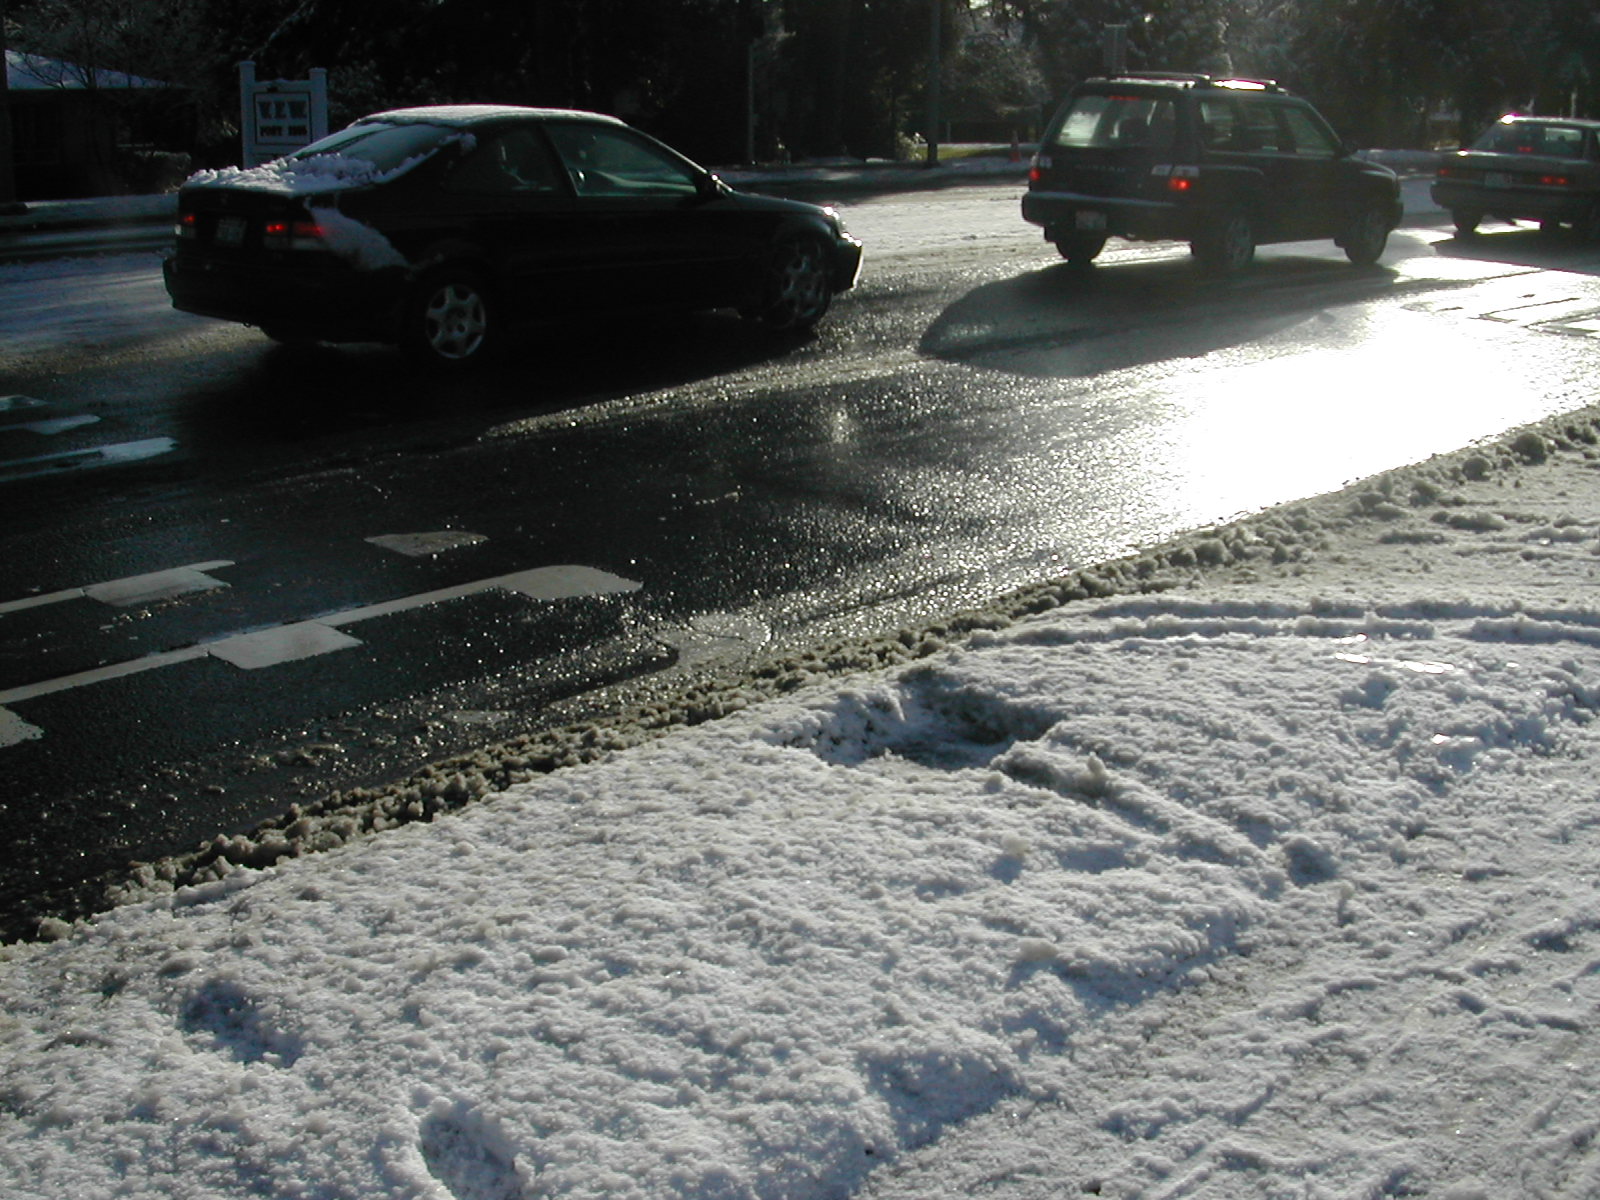
The backyard tree is another joy to me. The poor thing was hacked within an inch of its life and then abandoned, and the suckers had almost entirely taken over. (Picture, with snow for contrast, from a few weeks ago.)

Now, there’s a defined center-top, very few suckers (the two that were left have some of the only branches that are growing at the back of the tree, so they stayed), no more hacked-off knobs, and much sparser, healthier-looking branches. We’re delighted.

It’s still probably in its twilight years, but it looks so much less abused and dreadful.
Next step: convincing them all that we want them to visit for more than tree work. 🙂

A week’s worth of progress

I’ve finished the first row of my new daybed quilt!! Yay!

Even better is the fact that I now know how many rows it will all take – looks like seven is the magic number. (This is exciting to me – you don’t often get to use sevenths, and for some reason I still remember all of the fraction-to-decimal conversions from Mr. Valle’s 7th grade math class. It will be fun to employ them in the blog sidebar.) After mulling over the first two squares for a few days, I did end up adding a ¾” strip of magenta and reducing the size of the outer pink by ¼”. I think it’s a little less striking, but far more balanced – a tradeoff that I am completely willing to make. I’m no longer left wondering what’s missing, which is still my reaction on the old one. The first two will make great pillow tops.

Equally exciting, and probably deserving a fair amount of credit for my speedy progress so far, is that I have a new desk! It was a Christmas gift from Kevin’s parents after I’d mentioned that I’ve been considering a side-by-side setup for ages. Here it is in quilting mode:

I love that I can have the sewing machine set up while still having easy access to my monitor, mouse and keyboard! I tend to listen to NPR online while I quilt, and this makes seeing the story information, clicking to email, or changing shows so much easier. It’s also nice to me not to have to move the machine every time I’m done with it – it can stay put while it’s needed and then retire to the shelf when it’s not.

Also, I can finally cut long strips at my desk, instead of having to decamp to the kitchen table. 🙂 Certainly helps in keeping the creative mess contained.

Also, all of my mats, rulers and the rolling cutter can live on the spare keyboard tray when not in use (they seem most prone to my knack for finding perfectly-sized and subsequently unrecallable storage spots). I’m all pleased.

Tonight, after washing dishes, I finished cutting the strips for the next seven rows.

The decision remains: do I sew up all the strips, then starch, then cut into triangles and seam? Or do I only do enough for a row at a time? I’m torn.

First sewing on the new quilt!

I probably should have just waited an hour and kept going in the previous quilt post, but recent posts have seemed so long, so I decided to save it for another day.

I finally lived it up and bought pinking shears. Kevin was skeptical, but they were a great addition to the party. After washing and ironing all the fabric (all 52 inches by 19 yards of it, which happily didn’t fray in the washing machine), I cut a preliminary batch of strips. I was pleased that I remembered the lesson of the stretchy way vs. the firm way (aka, with or against the selvage) from two and a half years ago.

I sewed the strips into a panel.

I pressed the seams flat and starched them all stiff. (This was my first time using, or for that matter buying, starch. Very confusing – I had no idea what form factor to even look for. I finally found a spray can in the drug store, and the “heavy” version seems to be perfect for quilting. Once I started using it, Amanda seemed a bit jolted and said it smelled like her mom ironing her dad’s shirts – to me, just “how 1950s”. :-))

Once everything was nice and immobile, I cut the panel into squares, and the squares into triangles. (The bias cutting, and later seaming, creates the need for the starch.)

22 seams later (the same number as for a single 6”x6” log cabin block), I had two 11¼“ squares.

I’m very pleased (especially with how close the seams are to lining up. Yay, starch.), though I feel like the pink square needs more of the magenta flowers. Perhaps a strip around the outside of the diamond? Debates continue, though I think I’ll end up changing it – better fix it now and use the first two squares for pillows than continue to be irked by it.