A playpen for Bruno

My family all went to Brown – my parents (classes of ’73 and ’75) met there, and then I went (‘03), as did my sister (’05) and my brother (’07). It’s made me happy that Kevin (MIT) and I met right before senior year, so that he could get a good dose of the school before I graduated and moved on. So fast forward to pregnancy and when we knew it was a boy and weren’t forthcoming with a name, my dad dubbed him Bruno (an affectionate nickname for the Brown Bear – the school mascot). All of which is to say that I was very, very amused when college friends of Kevin’s surprised us with an amazing pack n play, and we opened the box to find this:

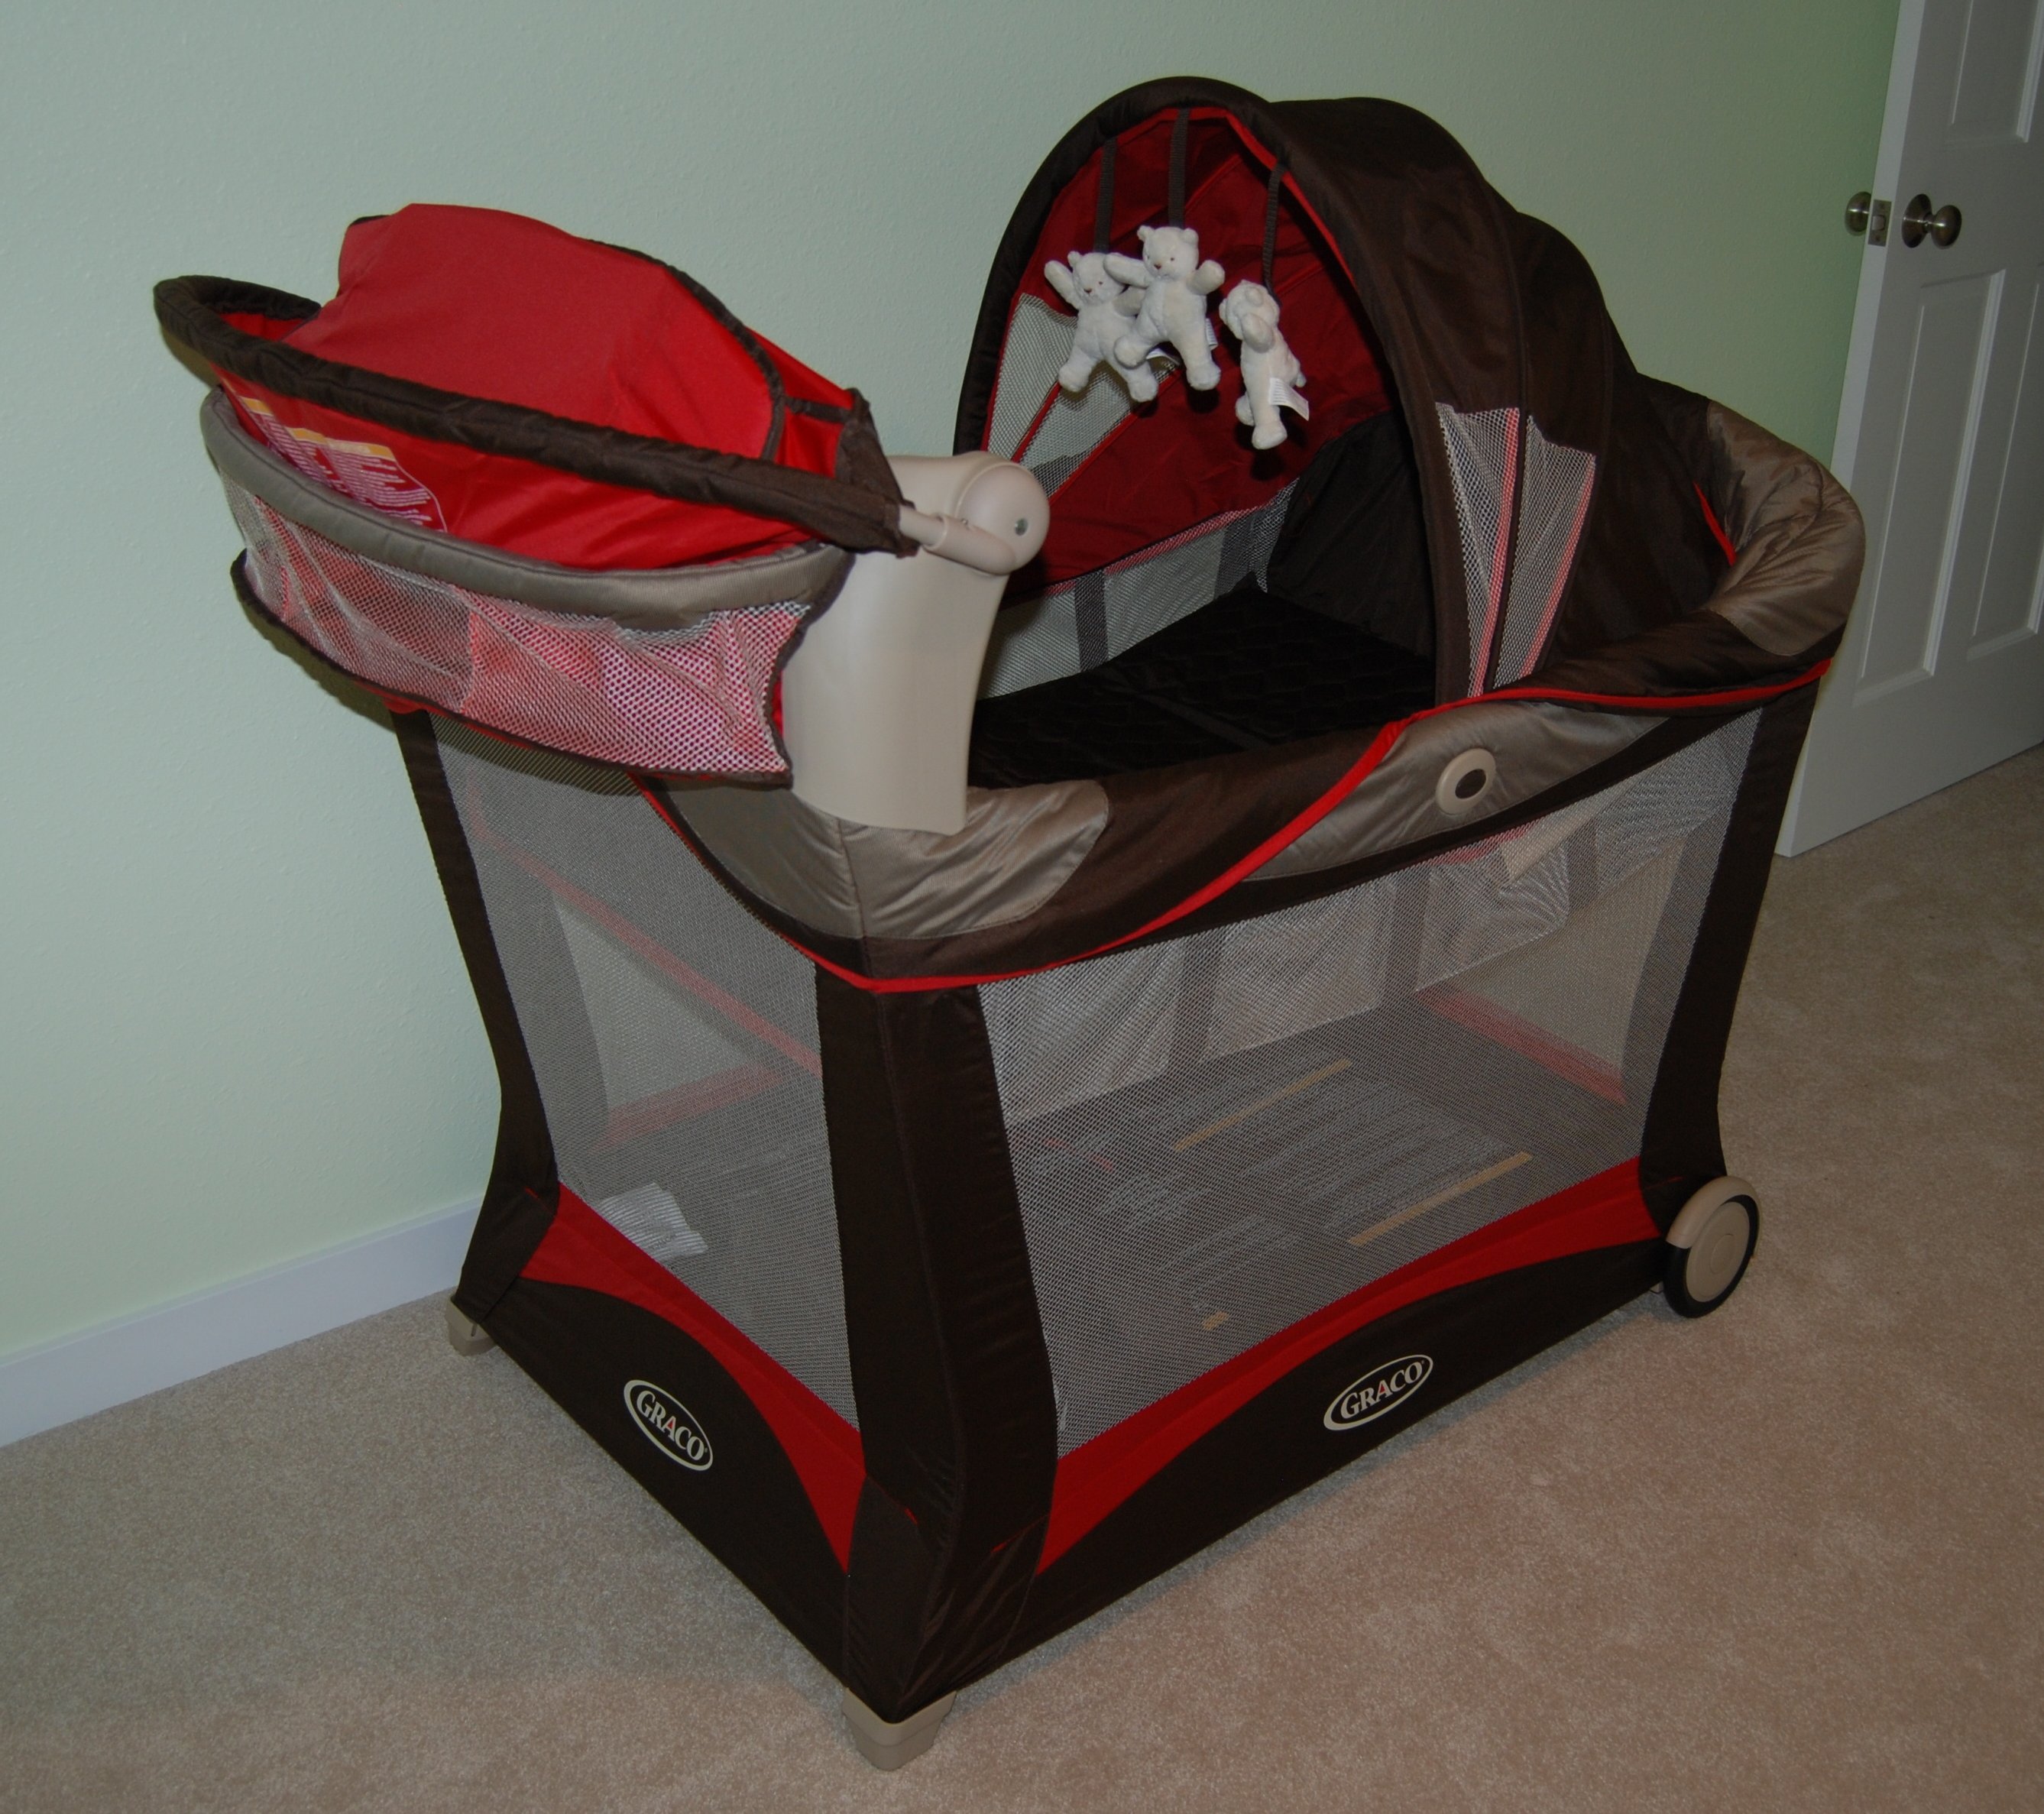
Brown and red, and with adorable little bears hanging from the sunshade:


We might as well employ the brown band to march around the nursery, playing Ever True. 🙂

Aside from the happy colors, it has all sorts of great features. We were planning on eventually getting a basic, cheap version (just the frame and the pad), but this has a bassinet for while he’s little, vibration and sounds, and a changer that folds out:


Neat! For the moment, it’s living in the otherwise empty nursery. We have the crib and shelves waiting to be assembled in the garage, but the carpet guys installed things incorrectly in that room, and so we’re waiting to set things up until they come out and redo it (eta: still unknown). Since we were planning to have him sleep in a bassinet in our room for the first little while anyway, it’s not seeming like a huge parenting failure to me, but it will be nice once we can finally have that room pulled together.

Pretty, but gone

Kevin and I apparently had a bit of a miscommunication about the wasp nest in our backyard. (I think I posted about it, but a quick recap: I’d been out in the yard in early July trimming bushes, when I decided to go deadhead the poor, ugly rhododendron in the backyard. I was only a few flowers in when all of a sudden there were bugs everywhere – I thought they were horseflies at first – and I ended up with 7 stings. Ouch.) Of the two of us, Kevin’s demonstrated quite a bit of success as the bee-fighter, and the whole poisons and late pregnancy thing confirmed that he would be the one to take on the nest. While I was calming down after the stings, I thought I’d said something along the lines of “you don’t have to eradicate them this instant, but of COURSE the nest needs to go”. For some things, I’m live-and-let-live, but there are definitely limits (like spiders who find their way into the house, and wasps that sting me in my own yard). Kevin heard something more along the lines of “bees are our friends, we’ll just avoid the area”. I was trying hard not to pester him about it, but finally asked, and we were both so pleased to realize there had been a misunderstanding.

So after work, Kevin went out with his telephoto lens to assess the situation and find the entry hole that he’d be spraying the killer foam into. The nest is an amazing thing.

It was built right under one of the groups of leaves. You can actually see in that photo where I’d removed one flower completely (center bottom), and gotten most of a second one (right above the nest). Since I was working with both hands, no wonder they went after me – I must have nearly had both hands directly on their home.

I think the colors are so pretty, as is the wavy construction. It’s pretty impressive, too, the way they just add more layers in spite of the things in the way, like the leaves that you can see being encompassed by the growing nest.

I was so glad that Kevin got the neat photos, and even happier when Operation Wasp Removal was a success and Kevin emerged victorious without any stings.

Bento Box Baby Quilt

With all of the hot weather, I’ve dedicated a lot of time to sitting with my feet up in cool places (love those comfy Starbucks chairs!). For my birthday, I got a Kindle (wonderful little thing), so that’s been a good source of amusement, but I’ve also finally committed time to sitting down and finishing the bento box quilt – adding the binding, and finally sewing in all of the loose ends from quilting.

You can sew on one side of the binding with the machine (generally to the front, but I forgot and sewed it to the back instead. Oops. Luckily, I think I’m the only one that will ever notice.), but the second side needs to be sewn by hand. I am so slow at that kind of work, but the effort is worth every minute – I love the way the binding looks when it’s done.

So smooth and finished.

Here’s the finished quilt, all washed and crinkly:

And the back, where the quilted circles are more visible:

Kevin took all of the photos. He was playing with his new flash, umbrella and other photo equipment, and managed to get an amazing shot of the texture (from the quilting and the crinkly, washed cotton) of the front:

I am so happy with the way this turned out. I think the quilting was a perfect choice – continuing the geometric theme started by the square piecing, but not too rigid. Somehow it doesn’t seem like a baby quilt should be all right angles – I like that the circles soften things a bit. The choice to use three groups of circles was mostly stylistic, but a sentimental part of my mind also thinks of them as representing the three of us as a family.

Finishing the baby’s knitting didn’t seem to convince him it was time to appear, but perhaps he was waiting for his quilt? I’m still a week shy of my due date (August 10th) so maybe he’s just biding his time in there, having too much fun with all of the stretching and hiccupping, but we’re very eager to meet him. 🙂

New territory

Sometimes the crafting is for the baby, and sometimes the baby is just an excuse to try something new. 🙂 Today was completely a case of the latter. I bought a lightweight jersey fabric, and decided to try my hand at sewing a baby hat and pants. The hat was from the SouleMama pattern here, and the pants are based on the instructions here. All of the stretchy stitches on my sewing machine are uncharted territory for me, so it took a lot of reading the manual before I felt confident in my stitch, needle and presser foot choices. For the hat, I sewed the side seams using the serger stitch. I have thought for ages that you actually needed to buy a serger to manage this – I didn’t realize my machine was already capable of it until I sat down and read the manual for the nth time. Very exciting!! I used the overcast presser foot, which is a marvel. It’s the oddest looking thing, what with the pair of center bars and the little fronds on the right side, but I’m so impressed at the cleverness of it.

To hem the edge, I used an overcast stitch right at the edge. (I had to rip my first effort where I’d tried to set the seam in about a ¼ inch – the stitches and hem margin couldn’t have been more variable if I tried – straight seams and stretchy fabrics aren’t a skill I’ve mastered yet, apparently.) I should have hemmed first, then sewn the side seams so that they would have lied flatter – something to remember for the future.

The pants were much faster, since I didn’t have to rip and redo nearly as often. The casing for the elastic is a little bit wonky, but they’re pretty good for a first attempt, and as Kevin pointed out, we don’t think the baby will notice that the stitches aren’t perfectly even. 🙂

A pretty cute set to go over a onesie!

I have a few more cuts of jersey, so I may make more if I feel inspired. The biggest question mark from the whole experience is whether my tension was off. The serging stitches pulled through a lot to the back, and the fabric was puckered together in a ridge under the stitches. I’m curious if using the zigzag foot would have prevented the pucker? Or different tension? The jersey was extremely light-weight, so it wouldn’t surprise me if the settings I used would be ideal for a stiffer fabric, but just not for this one.

Marvelous Additions

Our house doesn’t have great cross ventilation in the living room, fish room and kitchen. The bedrooms manage to move some air with the windows open, and the family room is great with all of those big screened windows and the ceiling fan, but the main rooms of the house get hot and just stay that way. When we went back to Kevin’s parents’ house in May, I was impressed at the retracting screen door that they’d installed in their kitchen. We decided to get quotes for them, and now we have screens on the front door, and across the double door in the living room. You can just see the white frame around the edges, and the handle on the far right:

When the doors are open, we get an amazing corridor of air flow through the living room. With all of the heat this week, the air outside generally doesn’t start to get cooler than the house temps until around 9 pm. By that point, the house is hot and stuffy, and we’re wild to get new, cooler air through. The guy came and installed them right before the worst of the heat hit, and they’ve been an amazing addition.

I think they’re going to be just as exciting once the heat finally breaks (supposedly Tuesday or Wednesday of next week?) and we can keep them open during the day for nice breezes through the house. (Again, I know these aren’t great photos – it’s hard to photograph something that’s effectively see-though – but at least you can at least see the white trim around the edges and the handle on the far left. You can also see how scorched the poor yard is.)

Those double doors in the living room are so appealing when they’re open – our back yard is one of our favourite parts of the house and it’s nice to feel like it’s even more accessible. I’ve sort of felt like we haven’t gotten to take advantage of our Seattle summer this year, since time on my feet or out in the sun hasn’t been as appealing as it usually is. We both have parental leave (Kevin’s taking two months, and I get five), and I’m having visions of how pleasant August and even September might be with our new screens. Hopefully that won’t doom us to another cold, rainy August?